How To Add Browser Push Notifications to your WordPress Site (Beginners Guide)


- Save
If you want to improve your blog, one of the best things that you can do is update your old posts to keep them relevant.
Blog posts are like wine: the older they get, the better they become!
Click To Tweet
But if you’re following best practices and updating your old content, it’s a good idea to tell your visitors that you’ve updated the post so that they know the content is still relevant. This is something I have been using on ShoutMeLoud for the past couple of years and it has been really helpful to our readers. In fact, two years ago, I did a case study on the effects of showing dates on the blog post and also wrote this follow up blog post. You must read these two posts as it is directly linked to your blog SEO and will help you attract more traffic.
Getting back to showing the last updated timestamp instead of last published:
The problem is, WordPress only shows the date when the post was last published, rather than when you most recently updated it, by default.


To fix that issue, I’m going to present a guide on how to show the last modified date on a blog post instead of the published date or the modified date besides the published date.
I’ll show you a few different methods using both code and plugins. While each method is fairly similar, there are some differences between them which I will point out.
Page Contents
How To Show Last Modified Date And Published Date At The Same Time
With this method, you can display the original published date, but automatically add a last modified date as well (but only if you’ve actually modified the post after publishing).
This is a good approach because it shows the age of your post, while also letting readers know that you’ve recently updated it.
To use this method, all you need to do is add a code snippet to your WordPress site.
While you can always add this code snippet directly to the functions.php file in your child theme, I recommend using the free Code Snippets plugin because it makes it easier to keep track of things later on. It also ensures, if you ever switch themes, that your new theme will continue to display the last modified date.
Once you install and activate Code Snippets, go to Snippets → Add New in your WordPress dashboard.
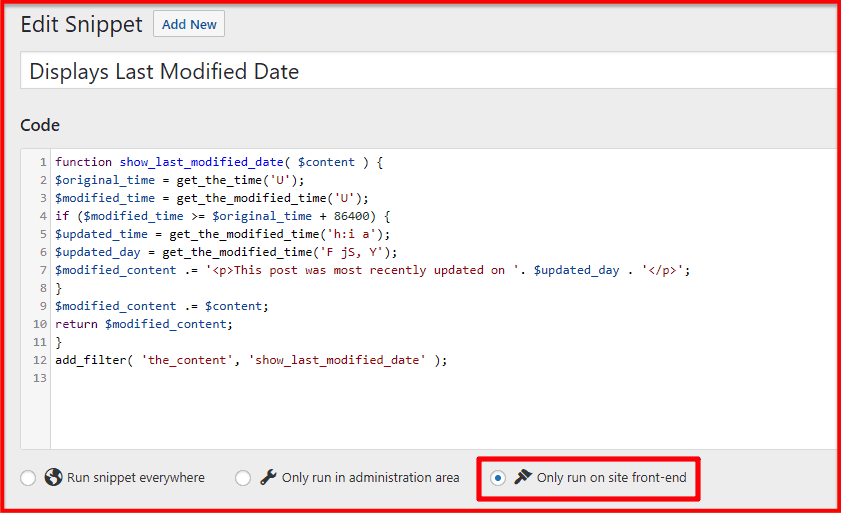
Then, paste this code snippet into the Code box:
function show_last_modified_date( $content ) {
 $original_time = get_the_time('U');
 $modified_time = get_the_modified_time('U');
 if ($modified_time >= $original_time + 86400) {
 $updated_time = get_the_modified_time('h:i a');
 $updated_day = get_the_modified_time('F jS, Y');
 $modified_content .= '<p class="last-modified">This post was most recently updated on '. $updated_day . '</p>';
 }
 $modified_content .= $content;
 return $modified_content;
 }
 add_filter( 'the_content', 'show_last_modified_date' );
Select the box for Only run on site front-end. Then, click Save Changes and Activate at the bottom:

- Save
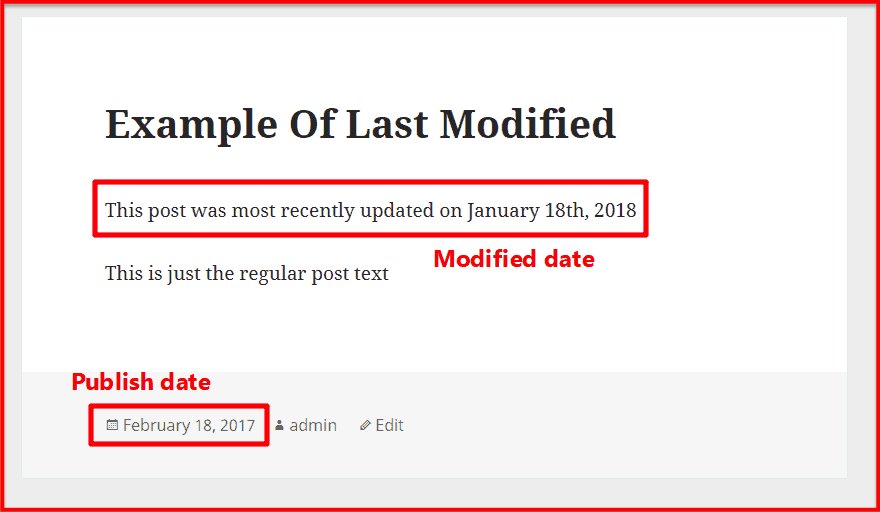
Here’s what the code does:
- Checks to see if the post’s last modified date is more recent than its published date.
- If the last modified date is more recent, it displays a message saying that the post was updated.
You can see an example of this below:

- Save
If desired, you can modify the text that displays before the modified date by editing the “This post was most recently updated on” text in the code snippet.
If you’re comfortable with CSS, you can also add your own CSS styling to make the modified date more noticeable.
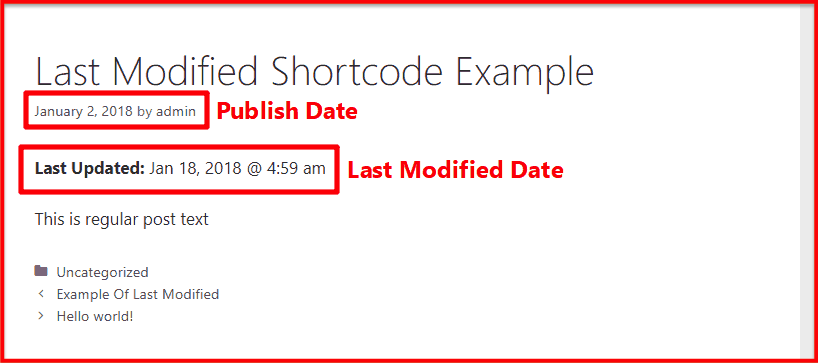
How To Show Last Modified Date On Blog Post With A Shortcode
If you prefer to avoid the need to use a code snippet, there’s also a free plugin at WordPress.org that makes it easy to display the last modified date of your posts via a shortcode.
The downside of this approach in comparison to the former method is that you have to manually add the shortcode to each post where you want to display the last modified date.
But the benefit is that it is very easy to use.
To get started, install and activate the free Last Modified Timestamp plugin.
Then, add the [last-modified] shortcode to the post where you want to show the last modified date, as well as an optional message before or after the date.
For example, if you input something like this on the backend…

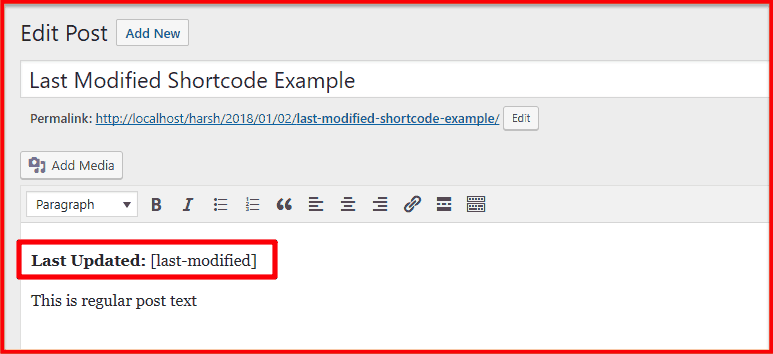
- Save
…it will look like this on the frontend of your site:
How To Create An Editorial Calendar For Your WordPress Blog

- Save
How To Show Last Modified Date On All Blog Posts With A Plugin
For another code-free option, there’s a free plugin called Post Updated Date.
Unlike the Last Modified Timestamp plugin from the previous section, there aren’t any shortcodes involved with this plugin.
Instead, as soon as you activate the plugin, it starts functioning.
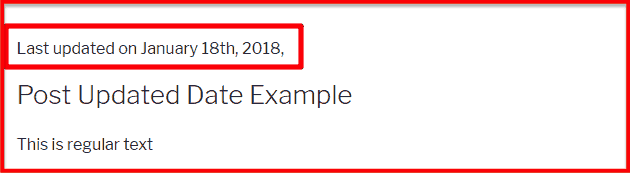
Here’s what it looks like after you activate the plugin:

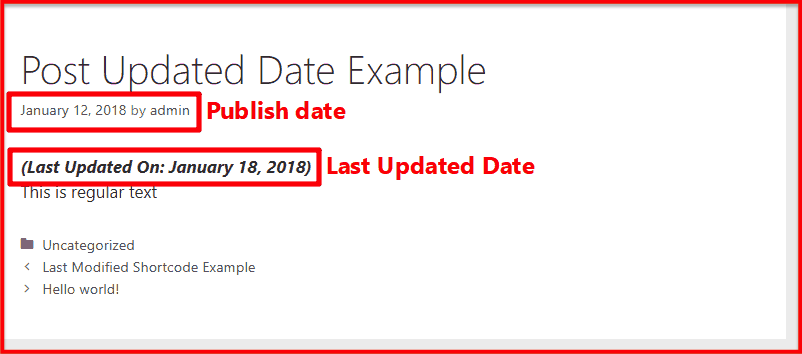
- Save
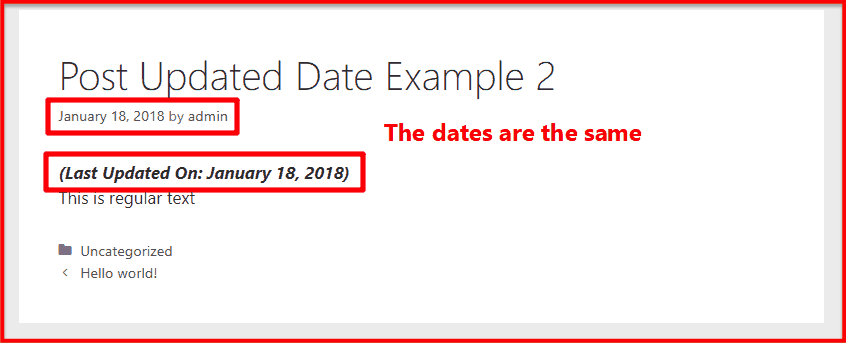
The only potential downside of this plugin is that it shows the last updated date no matter what.
The code snippet that I showed you in the first section only appears if you modify the post after its publish date. But with this plugin, the last modified date will still appear even if it’s the same as the publish date.
You can see this in the example below:

- Save
For that reason, make sure that you’re ok with this functionality if you decide to use this plugin method over the code snippet I demonstrated earlier.
How To Replace Last Published Date With Last Modified Date
So far, all the methods that I’ve shown you have dealt with showing the last modified date of a post in addition to the original publish date.
But what if you want to completely replace the publish date with the last modified date?
Well, it is possible, but it’s hard to give a tutorial on because you have to edit your theme’s template files directly and every theme handles showing post dates a little differently.
This method is good because it only shows the most recent date to search engines.
But unless you know a little bit about PHP already, I do not recommend trying this method by yourself.
Still want to continue?
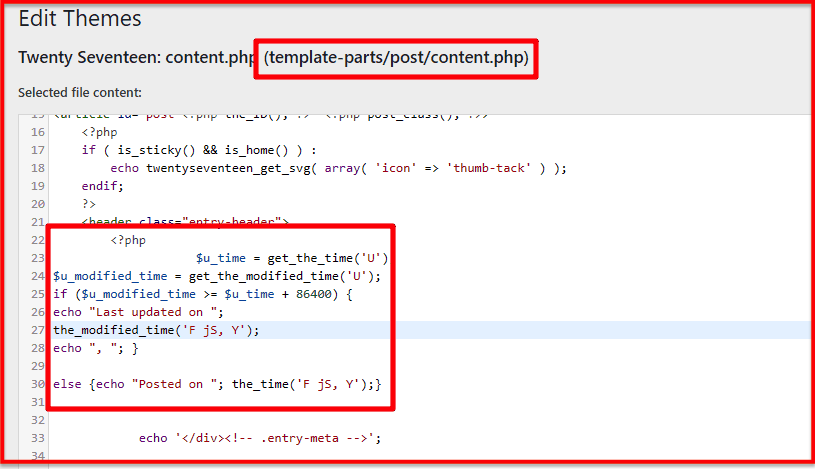
If you feel comfortable digging into your theme’s template files and have a recent backup of your site, find the line of code where your theme outputs the publish date and replace it with this:
<?php $u_time = get_the_time('U');
 $u_modified_time = get_the_modified_time('U');
 if ($u_modified_time >= $u_time + 86400) {
 echo "Last updated on ";
 the_modified_time('F jS, Y');
 echo ", "; }
 else {echo "Posted on "; the_time('F jS, Y');} ?>
This code will show:
- Posted on…[date] for posts that haven’t been updated
- Last updated on…[date] for posts that you have updated
For example, here’s how that looks when I edited the default Twenty Seventeen theme:

- Save
And here’s how it looks on the frontend of my site:

- Save
Again – this is definitely an advanced method. Each theme handles publishing dates differently, so unless you know the basics of PHP, you will struggle to implement this for your own theme by yourself.
Which Method Should You Use On Your Site?
For most bloggers, I think the first method is the best because it is flexible and also fairly easy to implement.
If you want something simpler, both the plugins are solid options, though they aren’t as flexible.
And if you’re comfortable editing your theme’s template files directly, the last method lets you only show a single date, rather than showing both the last published date and the last modified date.
Have you tried any of these methods? Which did you find to be the easiest to implement? Let me know in the comments!
Here are a few hand-picked articles to improve your WordPress Blog SEO:
- How To Set Up Yoast SEO Plugin [Updated]
Subscribe on YouTube

- Save
Sharing is caring ️
- More
How To Make A Private WordPress Blog or A Private Post [Tutorial]