How to Utilize WP Project Manager’s Invoice & WooCommerce Order Module to Take Your Business to the Next Level
93% of WordPress online stores are using WooCommerce right now. Hence, more than 30000+ of active WooCommerce multivendor stores are using Dokan. It is evident, Dokan is one of the most popular multivendor eCommerce solutions today. In addition to the powerful features, the credibility of this immense repute goes for Dokan modules.
Previously called as add-ons, a bunch of these modules can turn your multivendor WooCommerce shop into a powerhouse. Both for you and your vendors alike. It’s much like you add an extra hand to your process to accomplish more.
Today we will show you how to use three of such highly resourceful Dokan modules. They are Export-Import, Product Duplicator, and Single Product Multivendor. Let’s follow-through.

Export-Import Dokan Modules For Easy Data Transfer
Enabling your multivendor site with an easy export-import feature is crucial. It allows your vendors to transfer product information with full details anytime they want. This module turns that trait in your store. Vendors can import their data from another online store at ease through .csv or .xml files. Also, they can export the data following the same process.
Before you start using Export-import modules of Dokan, you need to activate it from the WordPress dashboard. If you are new to Dokan, you can easily check your configuration either they are alright or not. Just take a closer look at this complete installation guide.
Now keep reading the step by step process to use Export-Import dokan modules.
Step 1. Activate the Dokan Module From Your Dashboard
The activation process is quite easy. Just go to your WP dashboard. Click on modules on the sidebar. Then you will be directed to this dokan module page below.
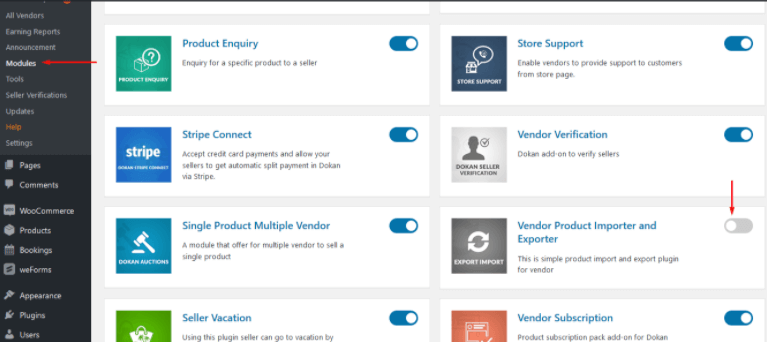
Now turn the slide on and thats it for the beginning. You have just allowed your vendors to export-import data from their vendor dashboard.
Step 2. Import Data Into a Vendor Account
In this step, you need to check if the module is functioning properly. To do this, just log in to a vendor’s account. As a marketplace owner, you can easily add a demo vendor account from the backend. However, you can check this guide to add new vendors anytime you want.
After log in to the vendor dashboard, you will see the ‘Tools’ option in the left sidebar. Click on it. Then click on Import.
This module of dokan supports two formats. Therefore, you can import your product information either using .csv or.xml file. Hence, we will show you both of them.
Importing an .xml File
Let’s go for the .xml format first.
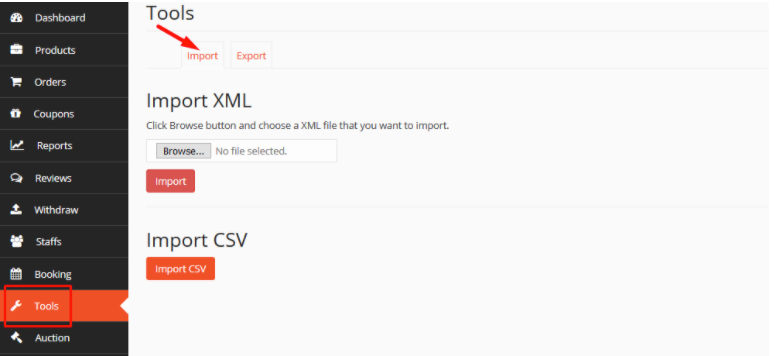
To upload a .xml file, just click on the browse option, choose the file from your computer. Then click import.
After you’ve done importing the .csv file, the page will look like this-
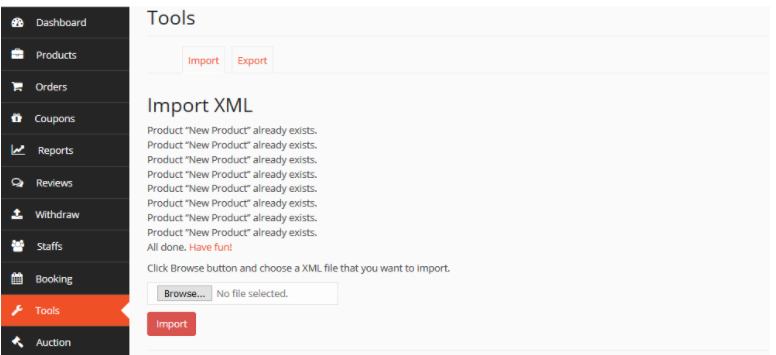
Now the .xml file you upload will restore the information on your website within few moments. Hence, if you want to upload image files of the respective product, you have to do it manually in the /wp-content/uploads folder.
However, importing a CSV file is a bit longer process than the XML format. But don’t worry, it’s also an easier one.
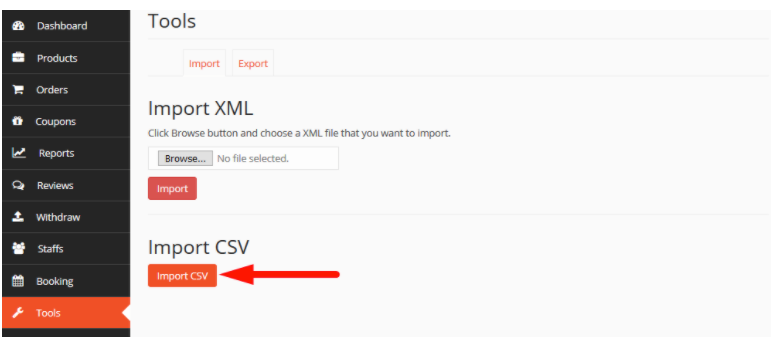
Importing a CSV File
Stay on the same “Tools” page. Click on the Import CSV just below the first option.
Now click “Browse” option. Then upload your CSV file, go for “Continue button.
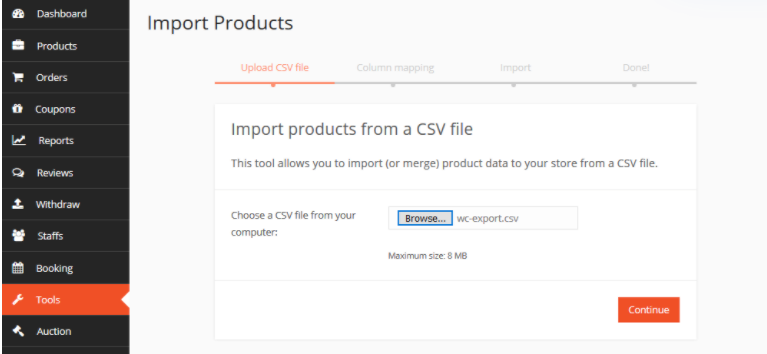
It take a few seconds, or minutes depending on the size of your file. Therefore, you must map columns to complete the importing process. Mapping ensures that your product restored in the expected fields like name, publishing status, availability, or descriptions, etc.
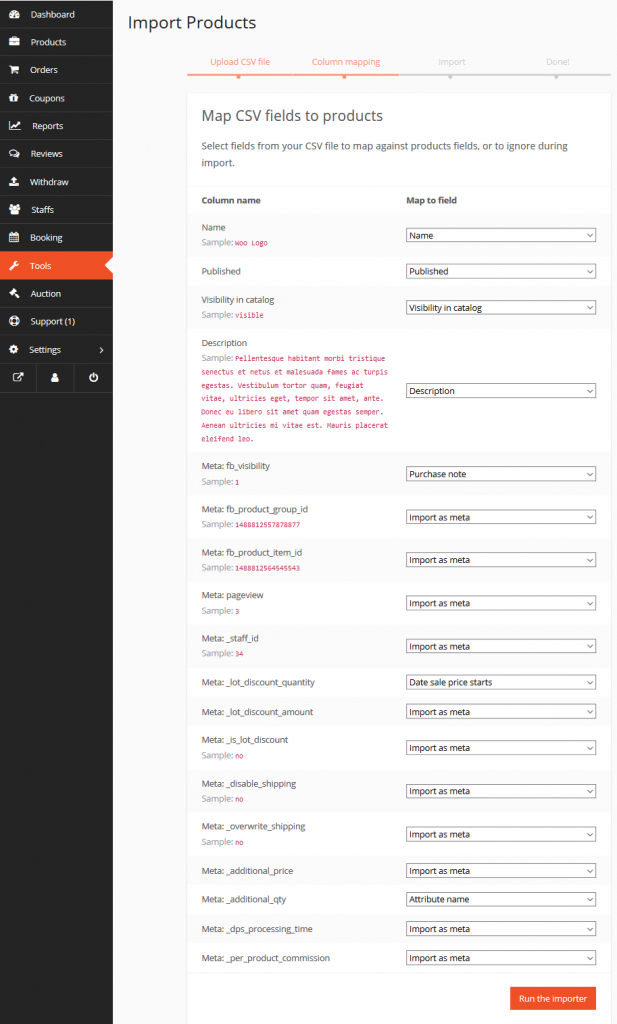
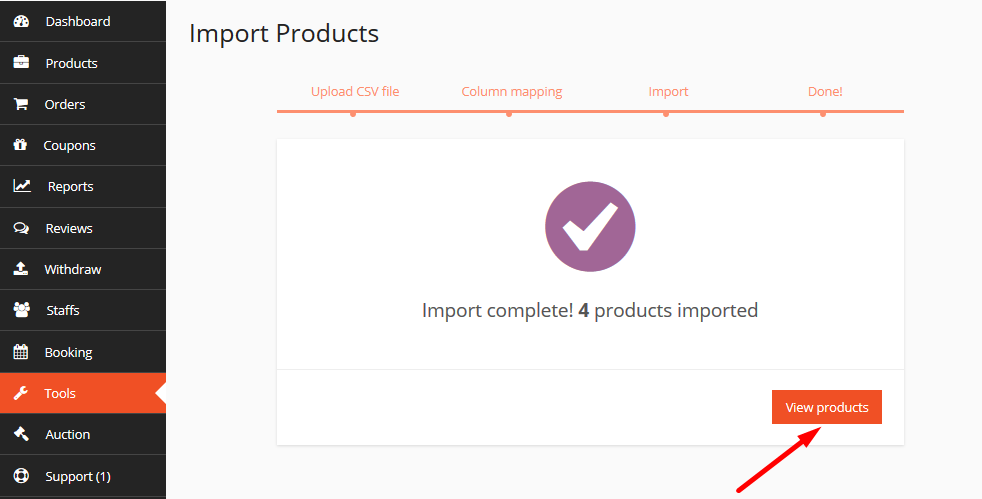
After done mapping, you only need to click “run the importer” button at the bottom. On the next page, you can see how your product data restored in your online store by clicking “View Products”.
Yes, it’s that simple if you think even as a vendors point of view.
Step 3. Exporting Data with the Dokan Modules
Exporting data help your vendors to extract their detailed product info from one of their Dokan account. And upload them to an another account. This is very helpful for your user who are comfortable to doing business through several multivendor.
From a vendor’s perspective, you can export data by using CSV and XML format the same as the importing process.
Here’s what you need to do-
From the same “Tools” page in the vendor’s dashboard, click the “Export” button. You may choose from three different options shown in the screenshots below. Usually, when you select this option, your export file will be in an XML format.
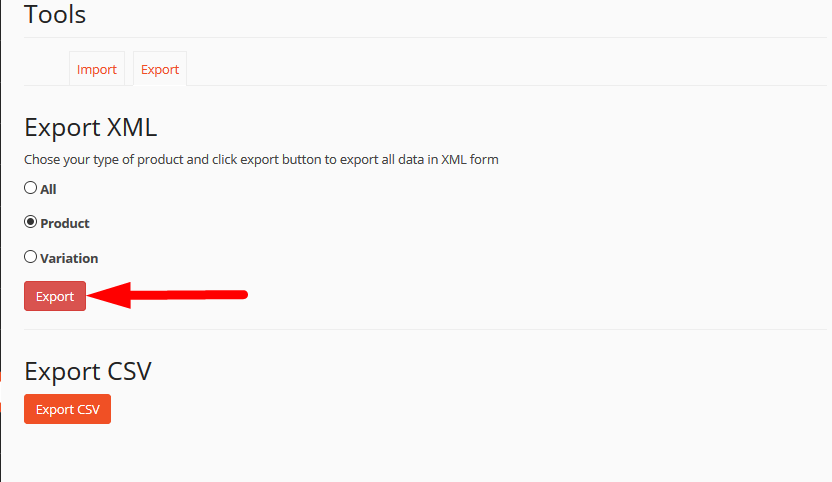
Therefore, when you download the XML file, save it as a backup. In case you lost your product data, this file would be a great help nonetheless.
On the other hand, if you need to export the data in CSV format, do the following.
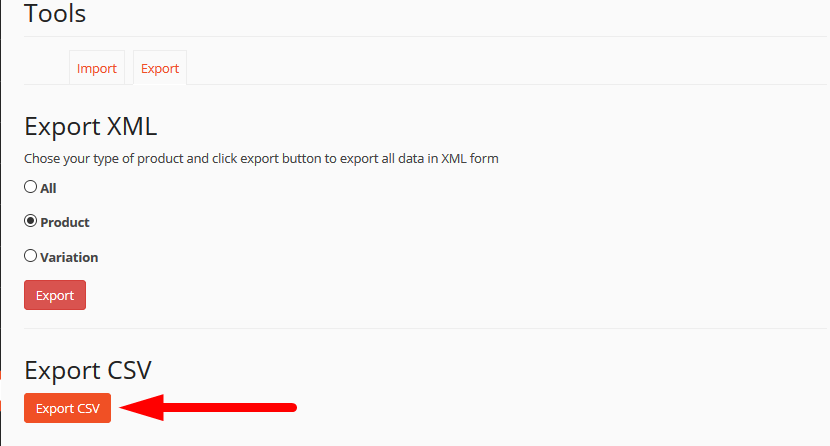
After you click on the Export CSV, you will be redirected to the page below. On this page you must define the columns and product types you want to export. It’s simple. Just make sure that you put the right names.
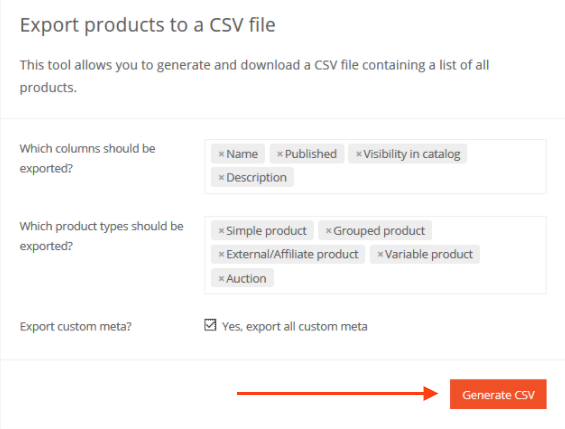
Click on the “Generate CSV” button. And you will get the exported product info in a CSV file instantly.
Moreover, there is also a direct approach of using Export-Import Dokan modules. Look at the image below.
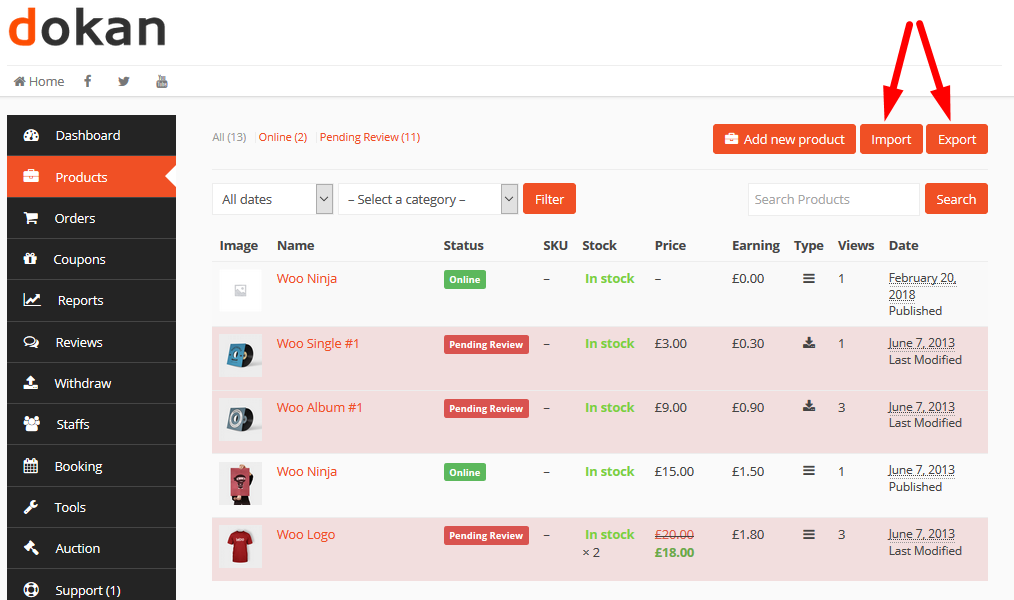
Your vendors can use their product tab in their dashboard to do the job also. However, both option takes you to the export-import page directly.
Well, now we will get a hand to the Product Duplicator.
How to Use Product Duplicator Dokan Modules
Suppose one of your vendor like to sell a similar product following another vendor. In such cases, he needs to copy the name and description, download the images, and then manually include the product to his/her store. It’s indeed a hassle.
Product Duplicator just makes your vendor smarter in that case. It helps a vendor to copy a similar product item from one Dokan based online store to another within a single click.
The top advantage of this Dokan modules are-
- It enables an “Add to My Store” button to every vendor’s store
- Vendors can sell each other’s product anytime they feel solidarity
Well, now check the way to use it in the simples way.
How to Build an Online Grocery Shop to Help People In This Global Crisis
Just Go to your WordPress dashboard.
Go to the “Plugins” section.
Search for “Product Duplicator” Dokan module.
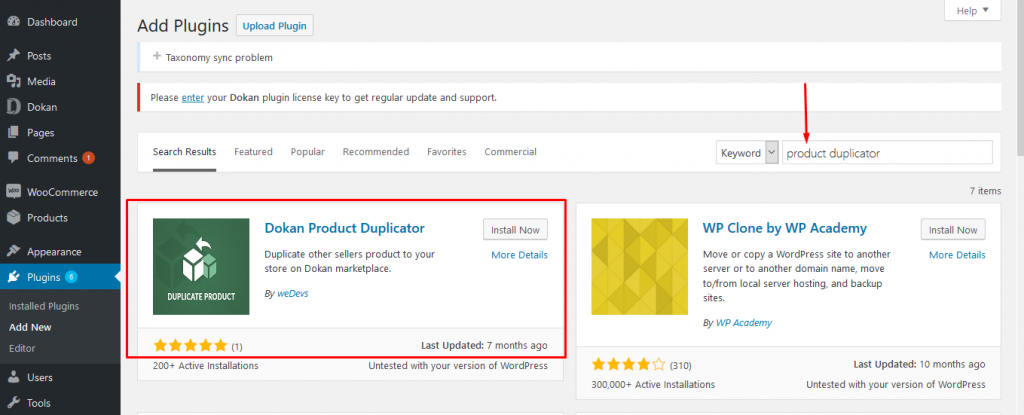
Install it in your store and activate the module.
After the activation, you only need to configure it a bit.
Take a look at the screenshot, change the duplicate button text like “Add to My Store”.
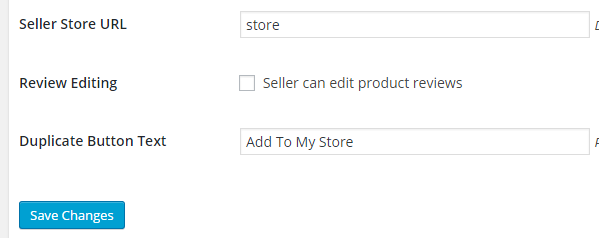
You can do this simply by going to Dokan from your WP-Admin sidebar, then Settings, and then Selling Settings.
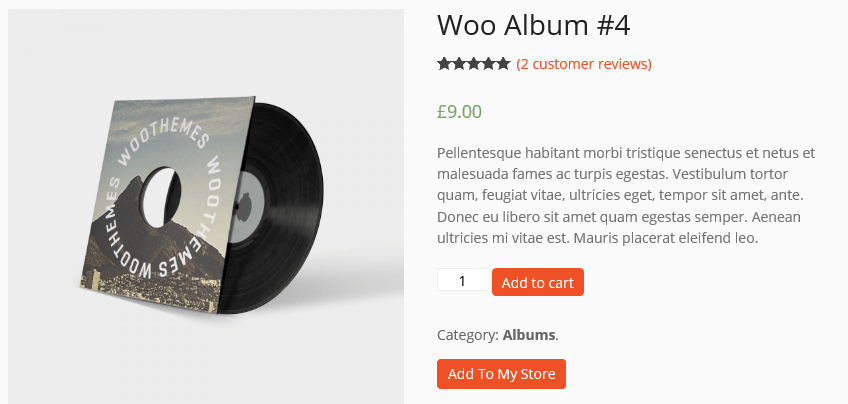
Like the image above, your vendor will get a “Add to My Store” button whenever they look for a product of any vendors in your multivendor store.
Translating Text Domain by Using Simple Code
Hence, there is one simple note for you in case you want to translate the text-domain. The method is lucid anyway. It only requires some coding.
Step 1. Rename the .mo file following this format:
pluginname-languagecode_countrycode.mo
Step 2. Rename the .po file according the below format:
dokan-duplicate-product-languagecode_countrycode.po/mo
Suppose, you want to translate the text domain into french, the code will look like this –
dokan-duplicate-fr_FR.mo
Furthermore, if you need complete translation help, you can always follow this guideline to translate Dokan plugins.
Single Product Multivendor to Sell Across the Stores
It’s almost similar to duplicating a product. Therefore, it is a more advanced and progressive feature you can enable in your multivendor shop. After you install the Single Product Multivendor Dokan Module, your vendors can sell any products they like from other vendor’s stores.
That means, your vendors can sell each other’s products anytime they want. They can use the exact info or customize it, even offer a similar, higher and lower price. So that the customers get a more flexible way to purchase by comparing different prices.
Now follow the steps below to know how to use the module and enhanced the features of your Dokan multivendor WooCommerce shop.
Step 1. Change Settings After the Installation
The installation process is similar to any other plugins or modules we’ve already shown above. After that stage, you get to change some configurations.
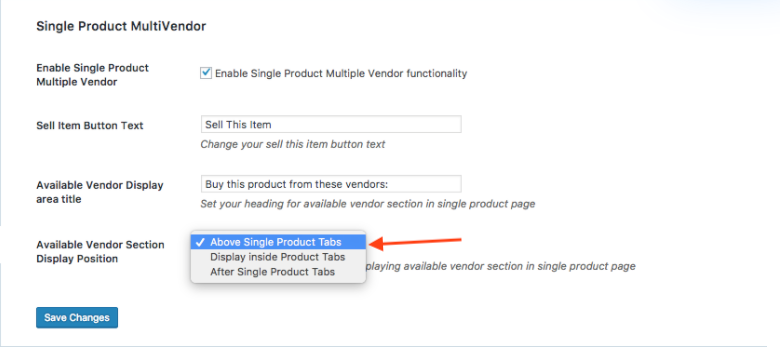
Go to your WP-Admin panel, then click on “Dokan” and then “Single Product Multivendor” just like the image below.

Mark the box to enable “Single Product Multiple Vendor” functionality.
Then just below it, you can change the button text. Here we have put it like “Sell This Item”.
Click Save Changes.
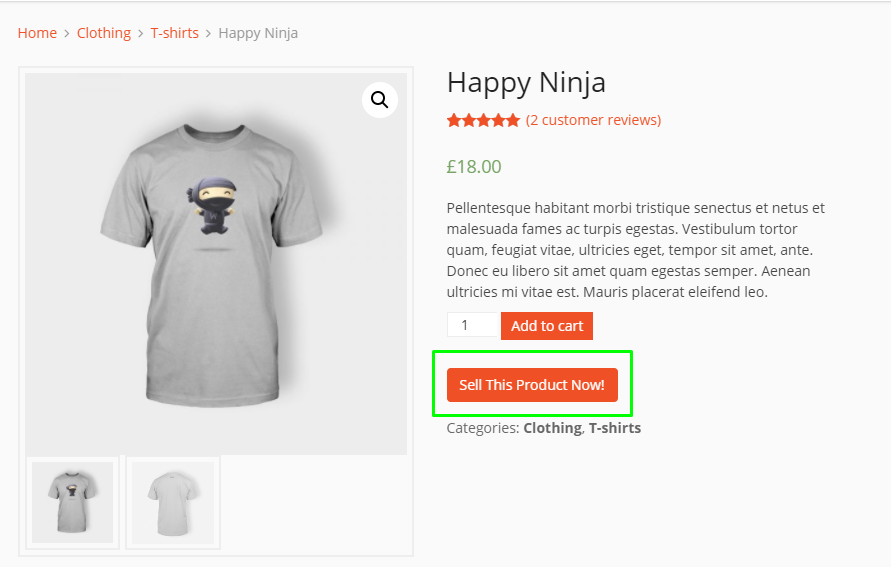
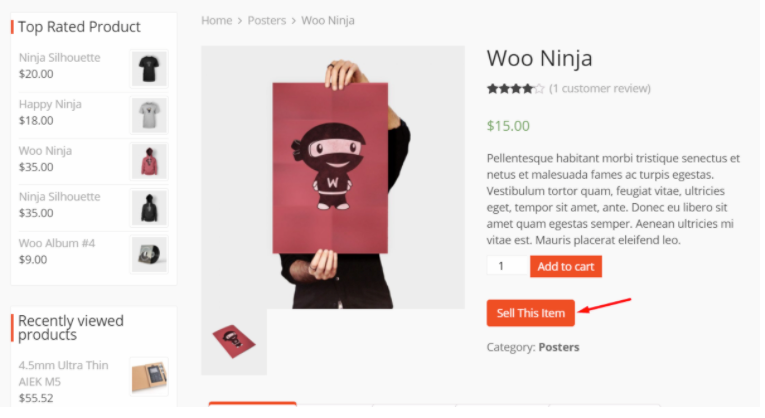
Now all of your vendor will see the “Sell This Item” button whenever they visit any product page.
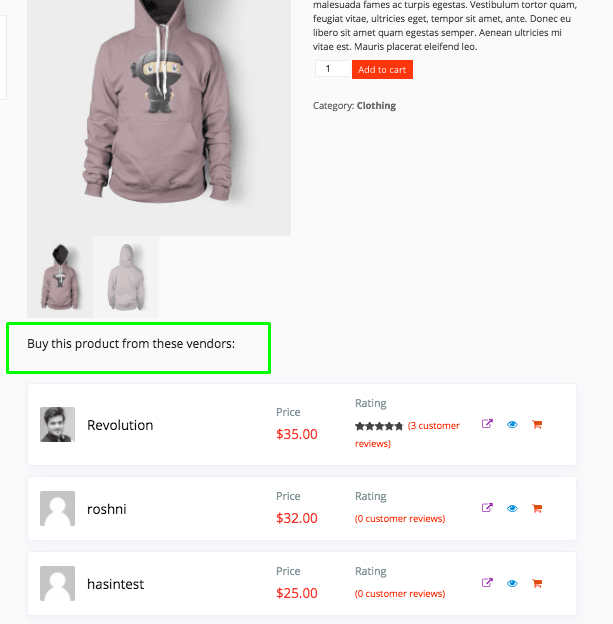
Also, you can set the option to show other vendors selling a similar item. Your vendors or customers will see those items from other sellers just below every added item.
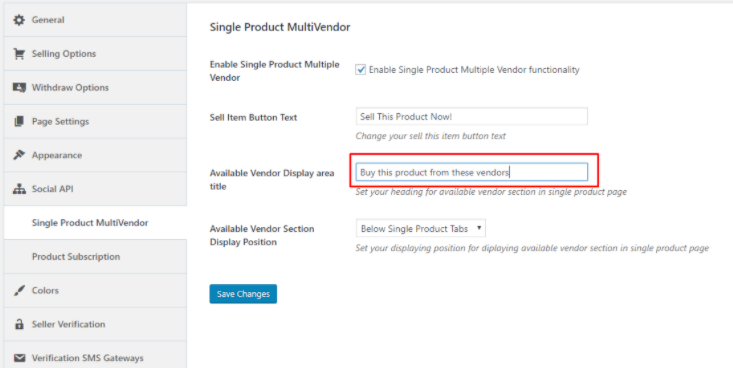
If you choose this option, you can customize the name anything you like. In the product page, your vendors and customers will see the product like this image below.
So, with each changes you made, your vendors will get the updated results. Some of the other options you may like to customize with this Dokan modules are-
Fixing the position of the other seller’s product. Your vendors can set it above or below their items.
Besides that, your vendor also change the product description, vendors info, and add reviews. It is open for more customization.
Step 2. Adding Product from Store-End
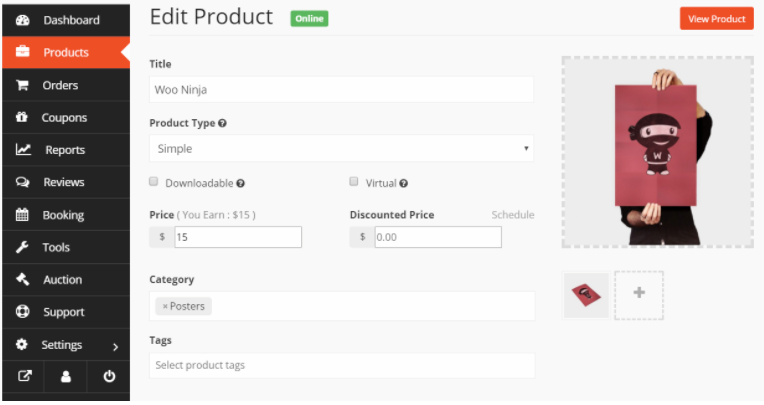
After you have done all the configuration and save the changes, go to any product from a demo vendor account.
Click to “Sell This Item”. That’s all you need to do to add the product in your store.
Therefore, the only thing left for you to do the easy updates if you want to change anything. Similar to the screenshot here-
Isn’t that so simple and fun at the same time?
However, if you want a more detailed process, you can check this Single Product Multivendor Installation guide. It will show you everything with all the necessary updates regarding the settings.
Final Thoughts On Using Dokan Modules
You can start using Dokan absolutely free. Moreover, the Product Duplicator Module is available to any version.
But if you want to integrate the Export-Import module, it needs a Business and Enterprise plan. The Single Product Multivendor also available in these two versions including the professional plan. To learn more, you can always check-in for Dokan Pricing.
Therefore, to enhance your influence and overall eCommerce business, there’s nothing better than getting a pro version of this robust multivendor WooCommerce store builder. It’s because the pro-plan includes almost all the superb modules to extend the features of your multivendor marketplace.
So tell us, which Dokan modules seems more important to you?
Try Dokan Right Now
Help Local Vendor with Your WordPress Marketplace in This Global Pandemic