How to Fix Mixed Content Error in WordPress After Adding SSL Certificate

- Save
If you’ve landed here, you’ve probably spent the time looking for all sorts of solutions to get Stripe to work on your website without an SSL or for multiple different free SSL solutions.
As a small business owner, I know paying for SSL or premium plugins can be stressful for start-ups with small budgets.
I am happy to share our solution for a FREE SSL on your woo commerce website, with FREE functioning stripe payment gateway with- No Coding Needed.
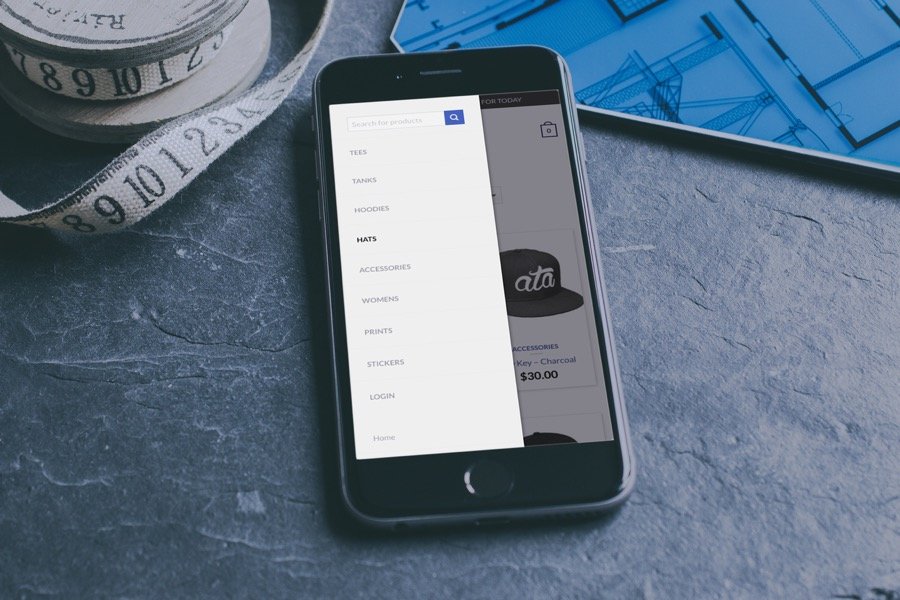
Follow the five steps below and you will be running in no time! For our example, we have a running installation on www.wearATA.com so feel free to head over there and check it out before you get started.


- Save
1. Install and activate all the following FREE plugins
- Woocommerce (Official website)
- WooCommerce Stripe Gateway by Automattic
- CloudFlare by Ian Pye
- CloudFlare Flexible SSL by iControlWP
Page Contents
2. Register and Set up a Stripe Account
Sign up for a free Stripe account here.
Once you have filled out everything from Stripe and your account is all set up your going to want to head to the top right corner of the screen click your account name and select account settings.
WordPress vs. Wix – Which is Better For Your Next Website?
From there navigate to API keys in the modal window and save these keys for later.


- Save
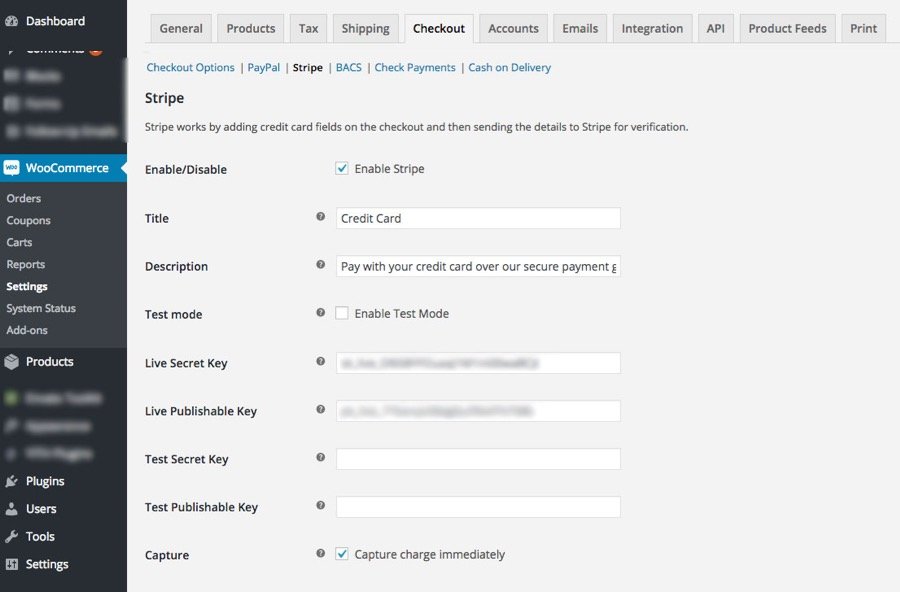
3. Link Stripe and WooCommerce
- Head into your WordPress dashboard and find woo commerce > settings on the left-hand side.
- From the nav bar on the top select checkout
- Select Stripe from the checkout options
- Enable Stripe and make sure you have the following fields filled out. Live Secret Key, Live Publishable Key, Capture: Capture card immediately enabled, Saved Cards: Enable payment via Saved Cards Enabled.
- Hit Save

- Save
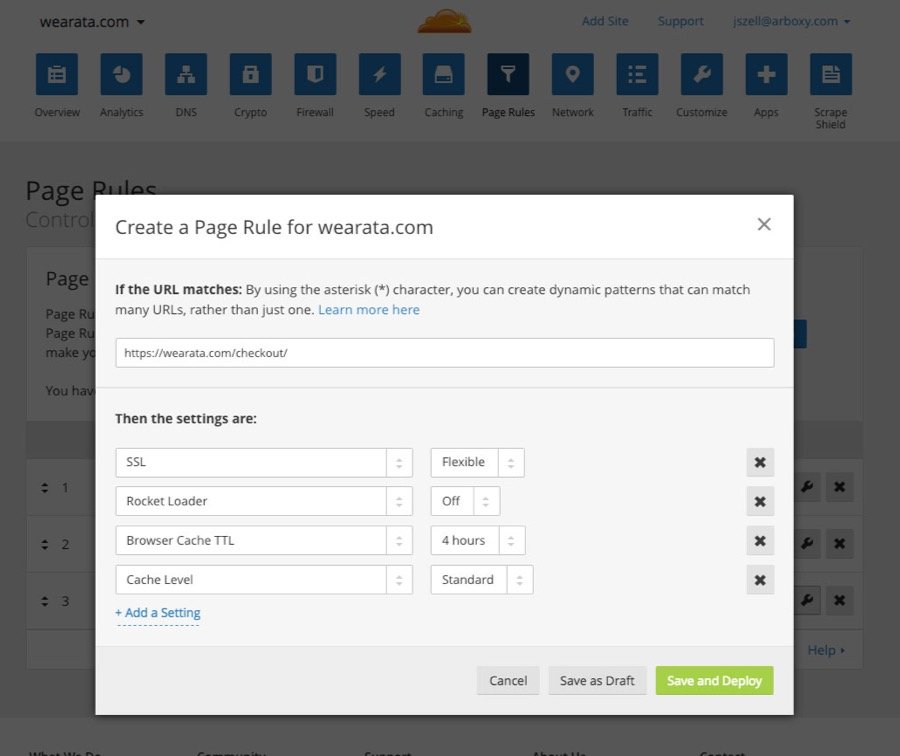
4. Setup CloudFlare and CloudFlare Settings
Sign up for CloudFlare here and follow the setup procedure. (this will also make your site faster! YAY!) Once you have your CloudFlare setup follow the next steps to make sure it’s ready for your SSL. (note: the following work with my server setup and should work with yours, if you’re having trouble you may need to alter some settings)
- Crypto Tab – Set the following options SSL: Flexible
- Firewall Tab – Security Level: Medium
- Speed Tab – Auto Minify: All Selected, Rocket Loader: Off (very important)
- Caching Tab – Caching Level: Standard, Cache Expiration: 4 Hours, Always Online: On
- Page Rules – See image… Make sure yourdomain.com/checkout/ has SSL: Flexible, Rocket Loader Off
- Network – Websockets: On, IP Geolocation: On
- Scrape Shield – Email Address Obfuscation: On, Server-side Excludes: On.

- Save
5. Set up CloudFlare WordPress Plugin
- In your WordPress backend navigate to Settings > Cloudflare on the left-hand sidebar.
- Input your domain name as it is registered with Cloudflare,
- Input your Cloudflare API Key (which can be found in Cloudflare under (top right) my settings > API KEY > Global API KEY
- Your Cloudflare Email address.
- Turn on HTTPS Protocol Rewriting

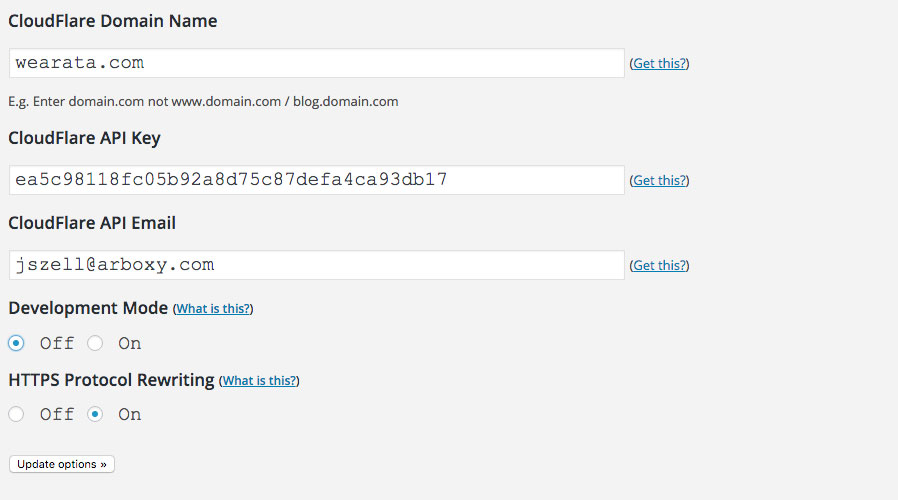
- Save
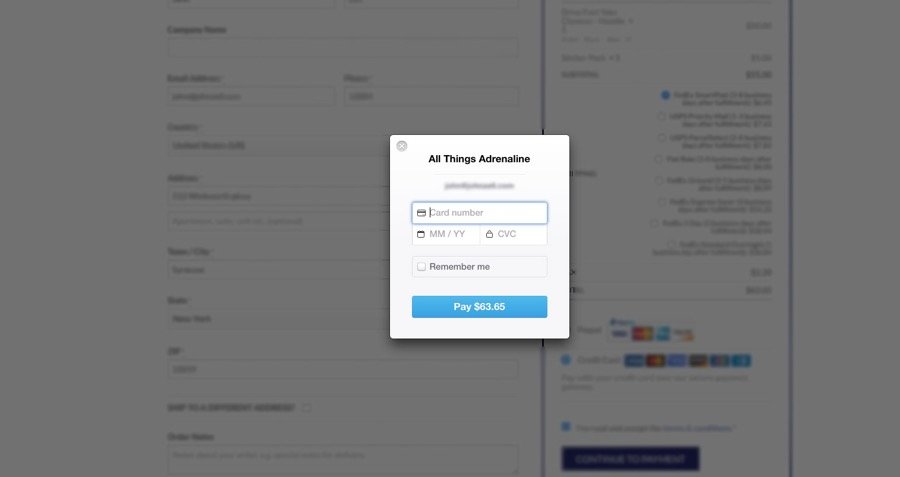
DONE!!
You should be all done. Your website should be able to take credit card payments over SSL + Stripe at no additional cost of plugins, or paying your host for an SSL.

- Save
Feel free to leave comments below and we will do our best to answer them promptly.
Here are a few hand-picked guides for you to read next:
- Squarespace vs. WordPress: Which Platform Should You Choose?
- 5 Tools Small Business Owners Should Embrace For Exponential Growth
- How I Opened A Bank Account In The USA From India: Stripe Atlas Experience
Subscribe on YouTube


- Save
Sharing is caring ️
- More
Leadpages vs. OptimizePress: Which One Is Better For Creating Landing Pages?