How To Customize Your WooCommerce Store Using Happy Addons
These days, developing a website for any purpose has become a cup of tea. And the reason is the content management system (CMS) like WordPress.
WordPress is easy (free) to install, expand, and update. Plenty of plugins & in-built templates help to get a flexible and simple interface. As a result, it minimizes development costs & implementation time.
So, all you just need to do is, prepare a strategic plan, and execute it in a right way.
However, if you’ve made up your mind & looking to create a website for free with WordPress, then this post could be very handy for you. Because we’ll walk you through a simple DIY (Do It Yourself) process of creating a WordPress site in just 5 easy steps.
But before we begin, let’s answer this question.
Why WordPress?
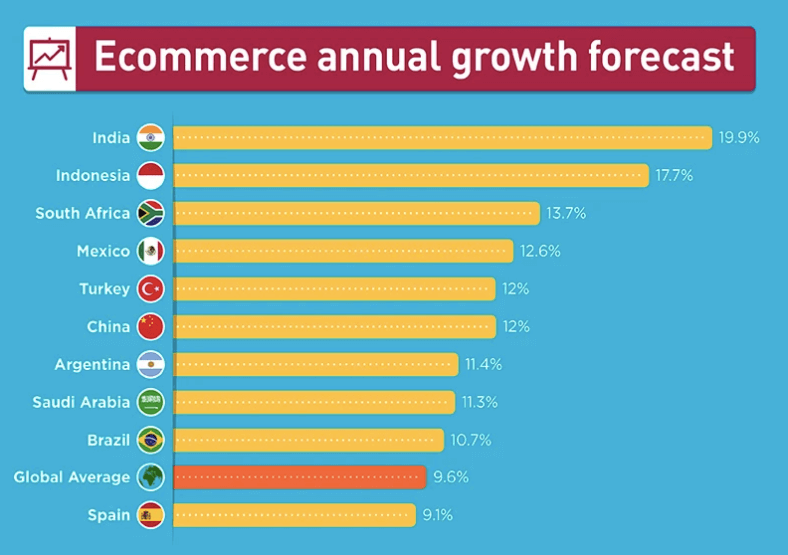
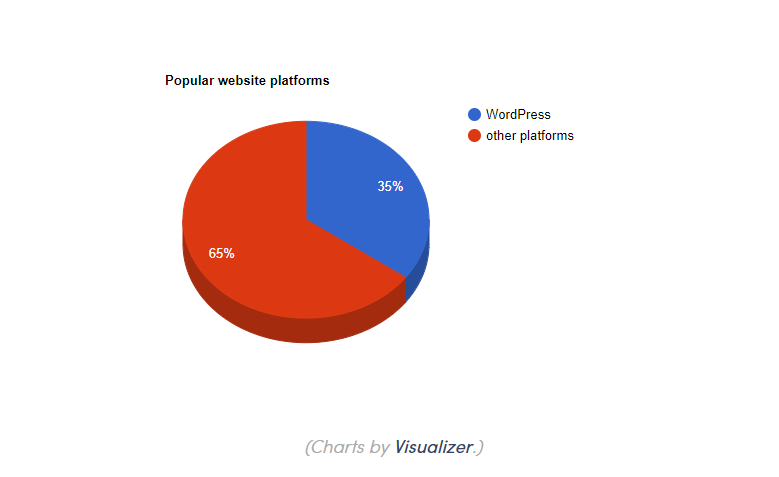
WordPress is now empowering almost 38% of the world’s website
W3Techs
There are several reasons you can find out why WordPress is actually beneficial for you.
However, for your convenience, let’s shortly get a glimpse of the following things in regards to WordPress & why it is the top choice for everyone.
- WordPress the most popular CMS (Content Management System) in the world
- 100% open source with easy expansion ability
- Highly customizable for great flexibility
- Super easy to customize with themes & plugins
- Totally SEO friendly
- Manage everything from one dashboard
- Safe & secured
Learn more about WordPress
5 Easy Steps To Create a WebSite For Free with WordPress
So its time to demonstrate the process of creating a full-fledged WordPress site step by step. For that, you would need to have patience and carefully follow all the below instructions.

So let’s get started:-
However, if you want to get a quick glance of the whole process then here are the steps for you:-
Table of content:-
- Choose a Domain Name & Hosting plan
- Download & Install WordPress (Free)
- Customize General Settings
- Download a Theme
- Create Essential Web Pages
01. Choose a Domain Name & Hosting Plan

The first and foremost step before creating a WordPress site is to choose a catchy & unique domain name. Actually, your domain name, or more commonly know as Website name holds your brand identity and it normally stays unchanged. So be careful while you choose it.
To help out in that case, you can follow the below tips while choosing a domain name for your website.
- Try to keep it easy to remember & proclaim
- Keep the name short & precise (For example, www.wperp.com)
- Make sure that it doesn’t contain any hyphens or numbers
Well, let’s shortly check out below some top domain name service providers that you can choose:-
- Domain.com
- Bluehost
- GoDaddy Domains
- Namecheap
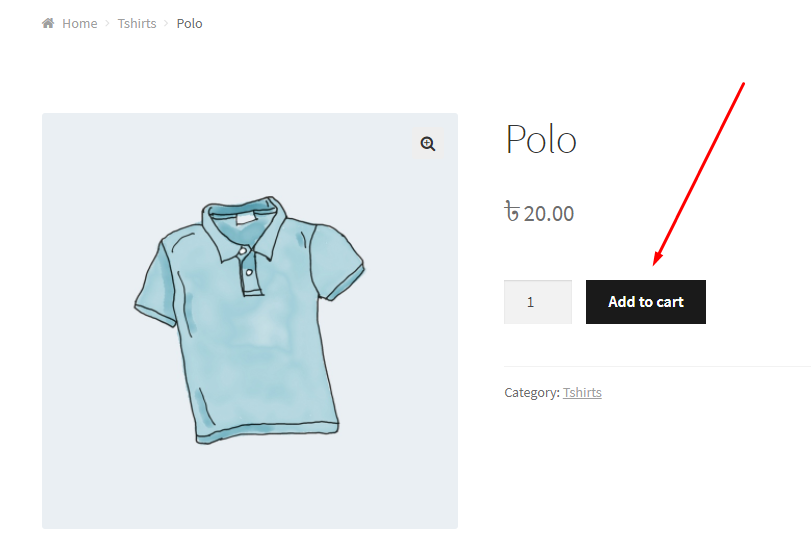
Let’s say you want to buy a domain name from ‘Domain.com‘.
Navigate to the domain search area. And type your desired name here. And if you want to proceed with this name, just click on the add to cart and complete the purchasing criteria.
Purchasing a Hosting Plan
Web hosting is the place where all the files of your website live. It is like the home of your website where it actually lives
Your next important task is to purchase a hosting plan. Well, you can find different web hosting services in the market which are really fantastic; you can pick the suitable one for your website.
Here are some top managed WordPress hosting service provider that you can choose from:-
- Bluehost:- It’s an official partner of WordPress itself. They provide sophisticated web management tools, regular automatic updates, and support from its professional expert support team.
- WP Engine:- WP Engine is a renowned & oldest ‘managed hosting‘ provider for WordPress. It provides shared, dedicated, or cloud-based hosting services with high-security.
- Hostgator:- It is one of the cost-effective yet powerful managed ‘hosting provider’ for WordPress. It offers unlimited email addresses, fast & secured, and cost-effective hosting plans.
- Cloudways:- Cloudways hosting is piled with the latest technology allowing the newest PHP versions, MYSQL as a database, and more
- Kinsta:- Suitable for users who want to keep an easy option for their site. Some of its packages are quite high. But if you want a user-friendly & powerful ‘managed hosting’ for your site, then Kinsta is probably the wise option for you to use.
And to know more about WordPress hosting service providers, check out the article below
Also Read: Top 15 Reliable Managed Hosting for WordPress
02. Download & Install WordPress
After selecting a domain name & purchasing a hosting plan, your next task is to download & install WordPress on your server. For instance, you can go through several tutorials to learn the installation process of WordPress.
Well, let’s follow the installation process of WordPress manually. In this case, we’ll be showing the process using FTP.
Also read:- How to install WordPress on Xampp
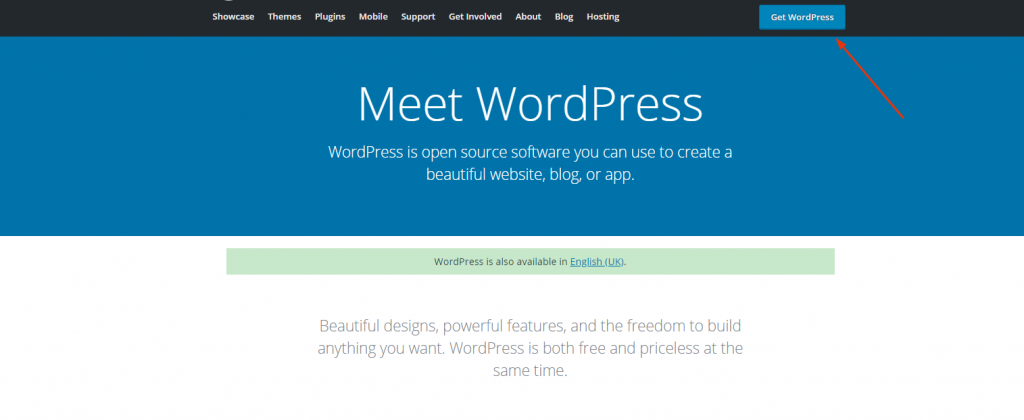
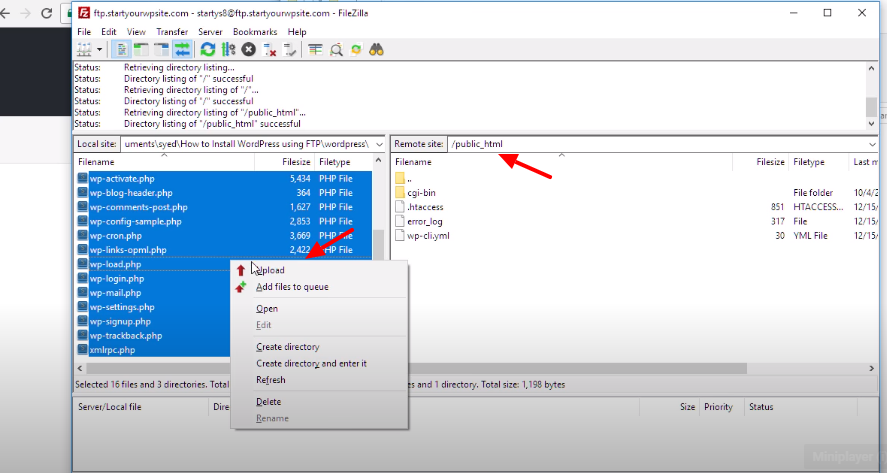
- First of all, you’ll need to have an FTP program to upload files. Then install FileZilla. After that navigate to wordpress.org to install WordPress.
- Next, unzip the downloaded file & upload it to the
public_html. In case if you’re unable to log in to FTP, ask your host for your FTP account information:
- While doing that, navigate to your cPanel account & find the MYSQL option to create a Database.
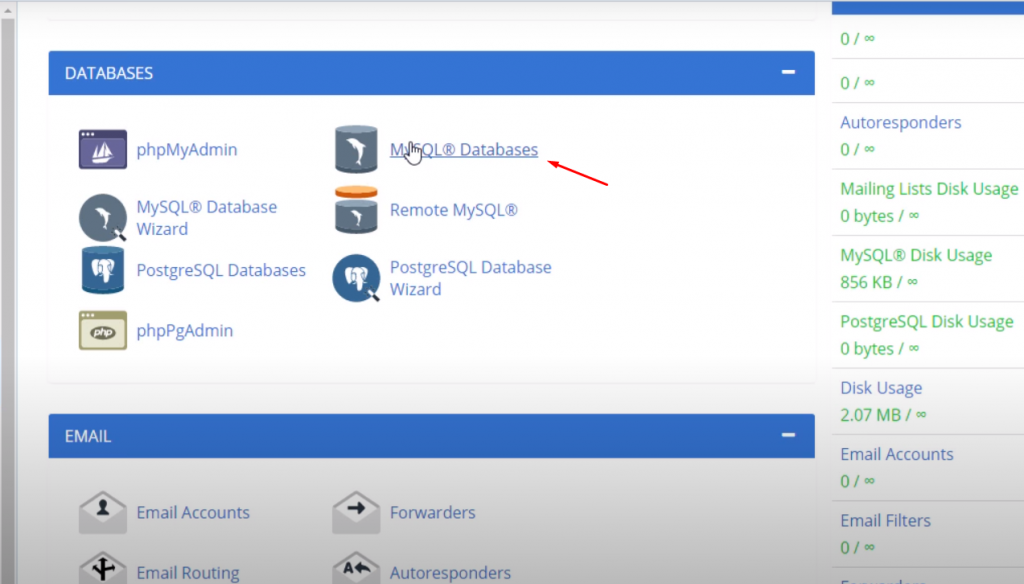
- After clicking on the MYSQL Databases, you’ll find an option to Create a New Database. So enter a name for your new database & click on the Create Database.
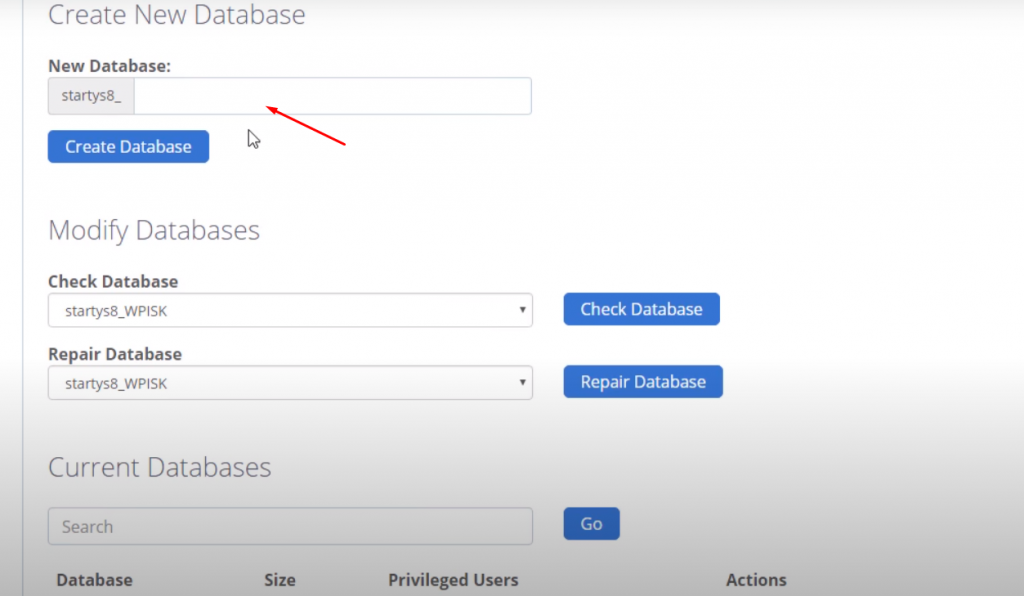
Note: You can change the name whenever you want – just remember it for further use.
- Next, you need to create a user for your database. Therefore, on that same page, slightly scroll down to MySQL Users & create a new user.
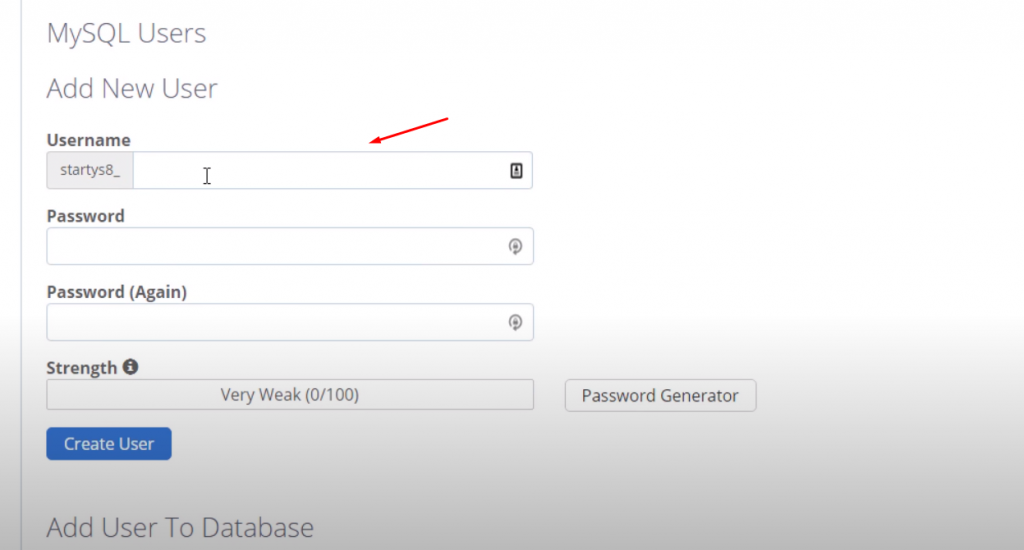
- Do make sure to give access to the database that you have created.

- Next, give the preferred privileges to that particular user.
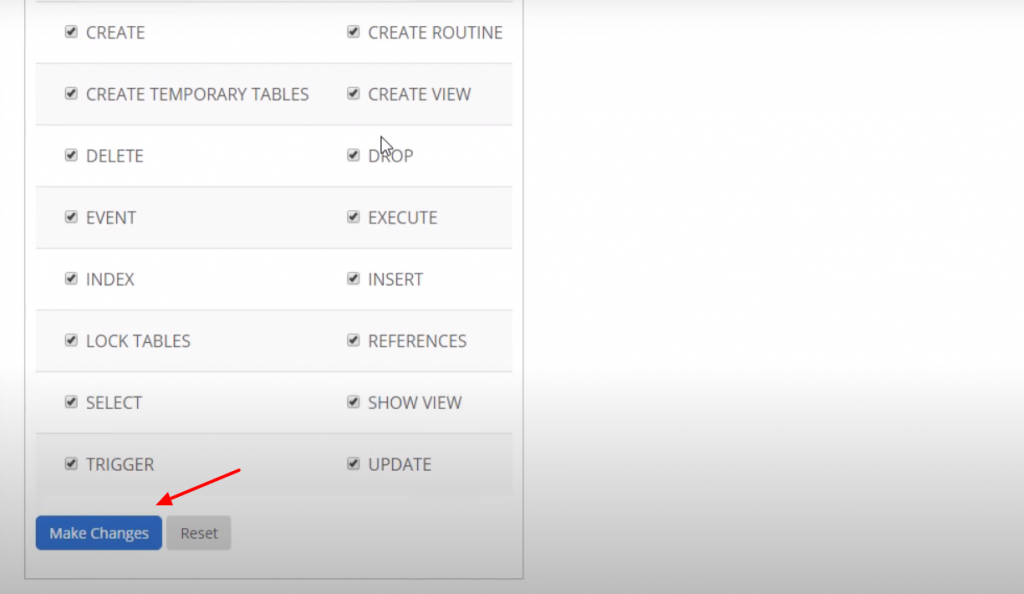
So after finishing the general settings of FTP, now type your domain name on the search bar to finalize the installation process.
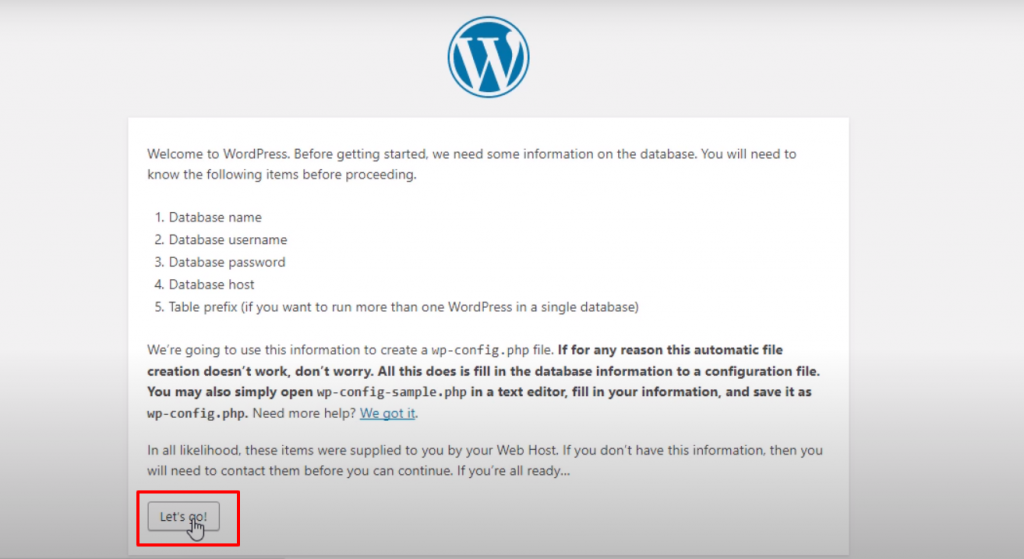
- Here you’ll get a simple WordPress installation wizard. So select the language that you prefer.

- Next, click on the ‘Let’s go‘ button.
- Type your details here such as your database name, username, & password. And then click on the submit button.
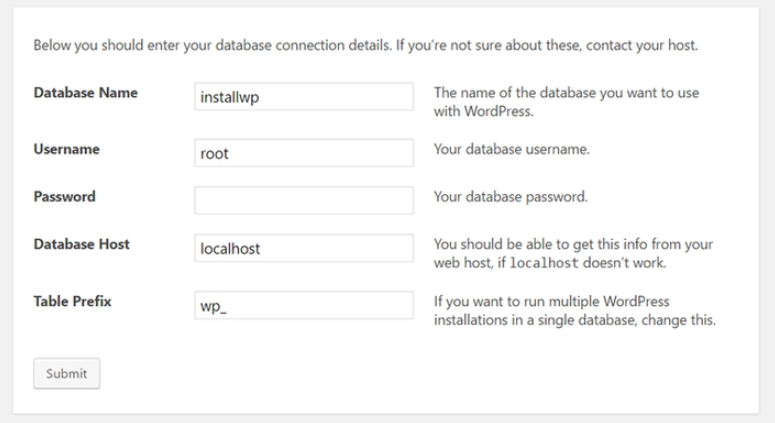
- After that click on the ‘Run the install‘ button to continue.

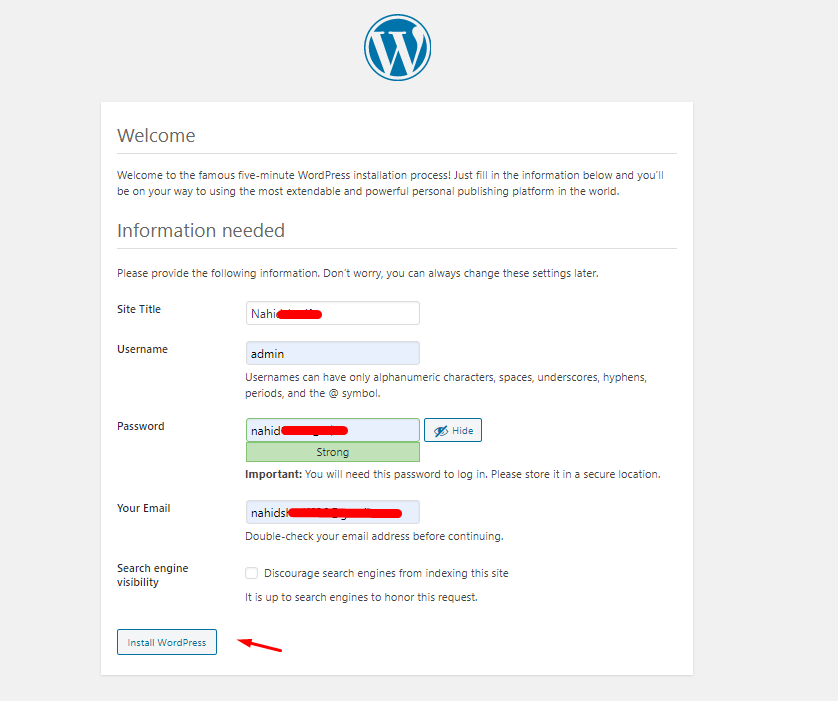
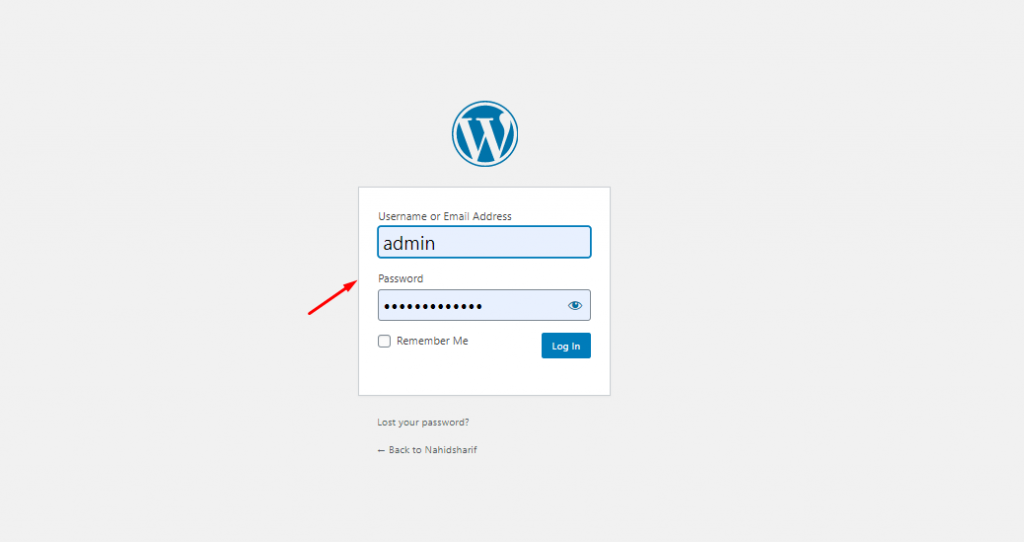
- Give your site title, username, password, email and click on the Install WordPress button. That’s it!
So finally manual installation process of WordPress has come to an end. Hurrah! You just have learned how to install WordPress manually. Now enjoy your newly launched website on your localhost!
Note:- In order to test your WordPress site in the localhost, you can go through this guideline. Or you can check out the following video tutorial to get a detailed idea.
How to create a website for free
03. Customize General Settings
So after the installation process, you’ll directly enter your website’s dashboard. From here you can customize certain things. Such as:-
- Type your website title
- Give a tagline
- Tick mark on the ‘Anyone can register‘
- Set up Date & Time format
Therefore to customize settings, navigate to the on the WP Dashboard>Settings>General.

Next, click on the ‘Writing‘ option. Here you just need to select the default post category & post format.

Now in the ‘Reading’ option, you can customize certain things such as ‘Home Page display‘, number of blog posts that you want to show, etc. But keep in mind to unmark the ‘Search Engine visibility‘. Otherwise, search bots will not find your website to index.

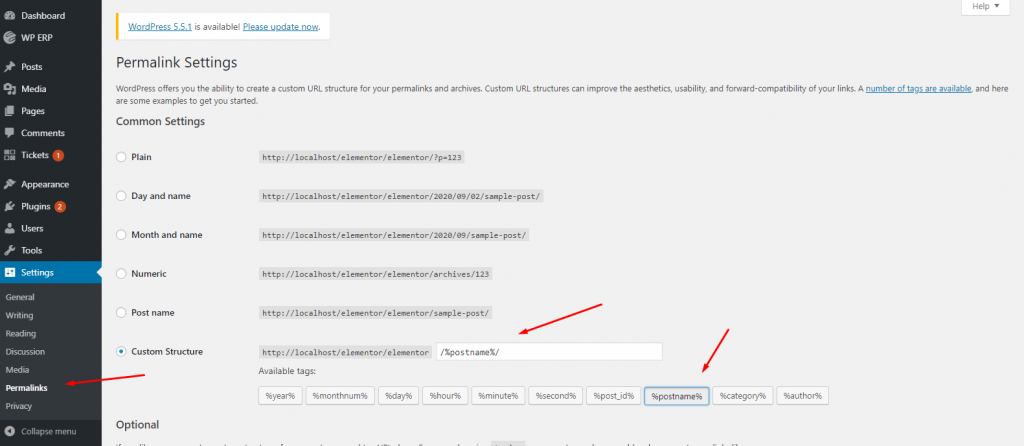
After that, you need to set up your post’s permalink. For that, click on the ‘Permalink’ option. And then give it a custom structure.
For example, Yoursite/%postname%.
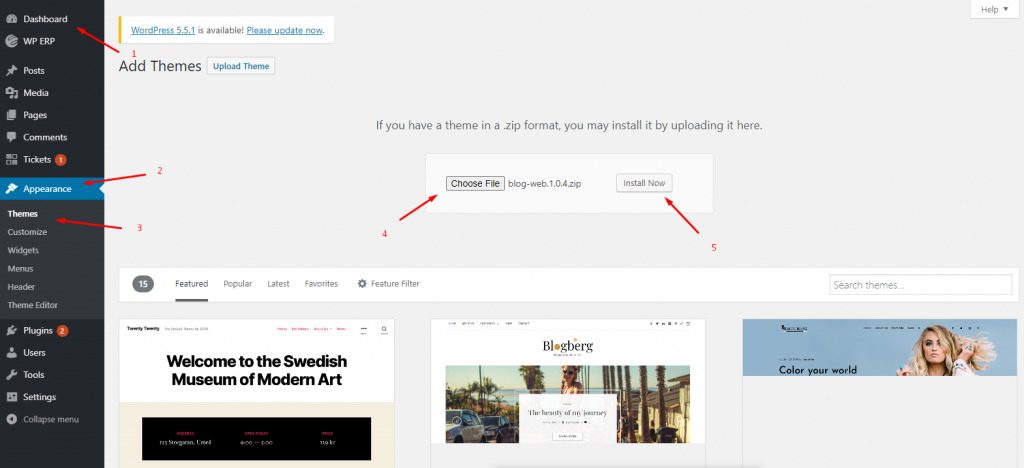
04. Download & Customise a Theme
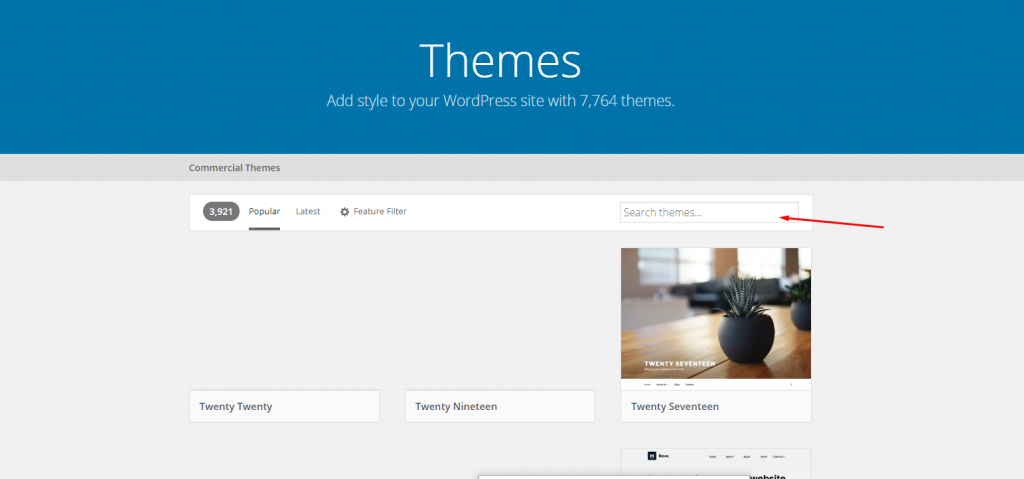
After carefully completing the above steps, now it’s time to download & install a suitable theme based on the type of your WordPress site. You can buy a premium theme from different available marketplaces. But initially, if you want to use a free theme, you can directly do that from the WordPress platform.
Because WordPress has a wide range of free themes collections. So it’s totally hassle-free to download and activate at the time of choosing a theme for your WordPress site.
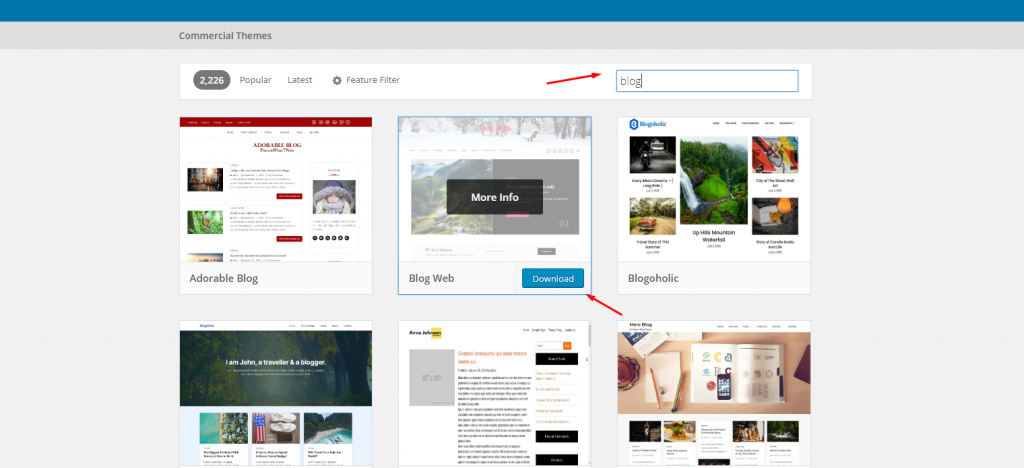
You can also filter the themes that you’re looking for. It is essential to make sure that you’ve picked up the right theme for your WordPress site. Otherwise, it will be a hassle for you, especially whenever you’ll decide to customize it.
So after selecting the desired theme for your WordPress site, simply download it.
Get Deep Insights of Your Store Using Dokan (Vendor Analytics Module)
Next, navigate to your WordPress Dashboard>Appearance>Themes>Upload the Downloaded File>Install & Activate.
Note: In case if you don’t know the process of customizing a WordPress theme, you can read this guide on ‘how to customize a WordPress theme‘.
That’s it your theme is ready for use. Enjoy!
Note: You can create your own website with the powerful website builder TemplateToaster. Also, create your WordPress website theme from scratch with this easiest to use drag and drop website builder. You can also have hundreds of WordPress themes within the software for free.
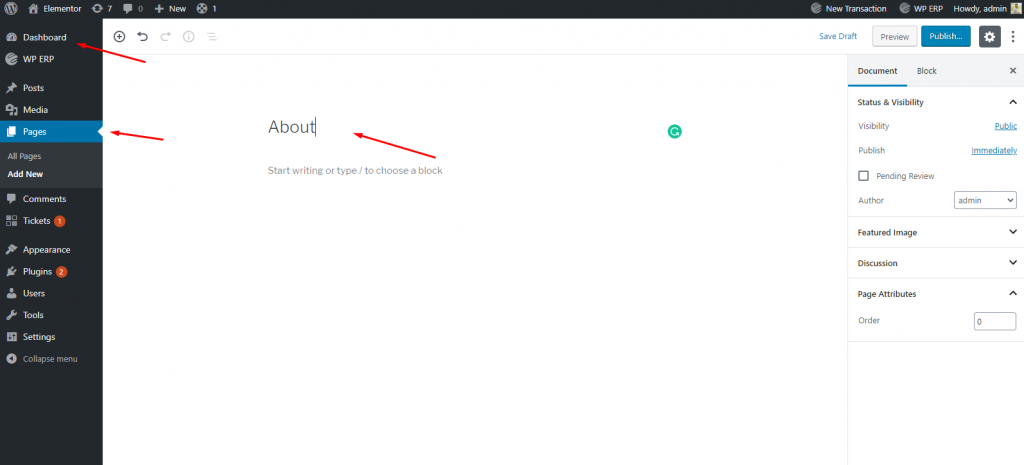
05. Create Essential Web Pages
Well, your next mission is to set up your website pages. This process is so easy that you can swiftly do it only in minutes.
First navigate to WordPress>Pages>Add new page>Click on Publish when you’re done.
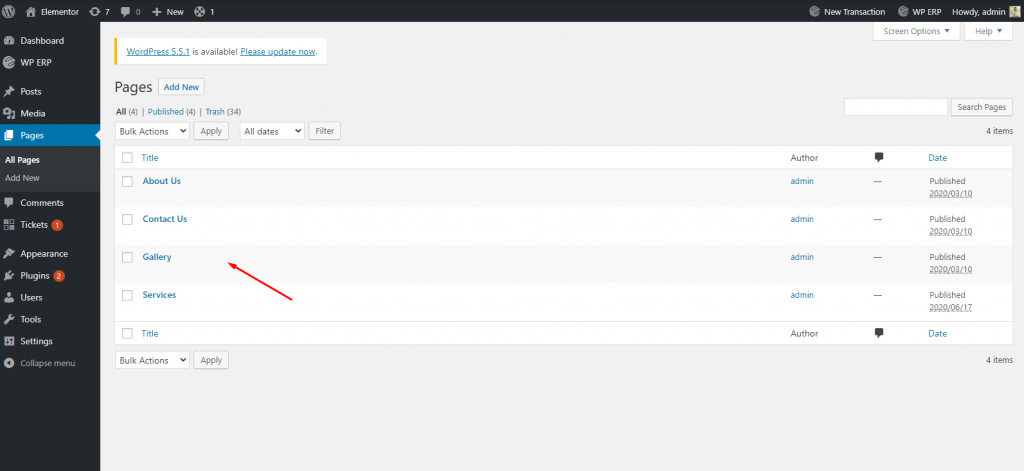
So following the same process, you can add other pages that you want to add.
For example:-
- About Us
- Gallery
- Services
- Contact Us, etc.
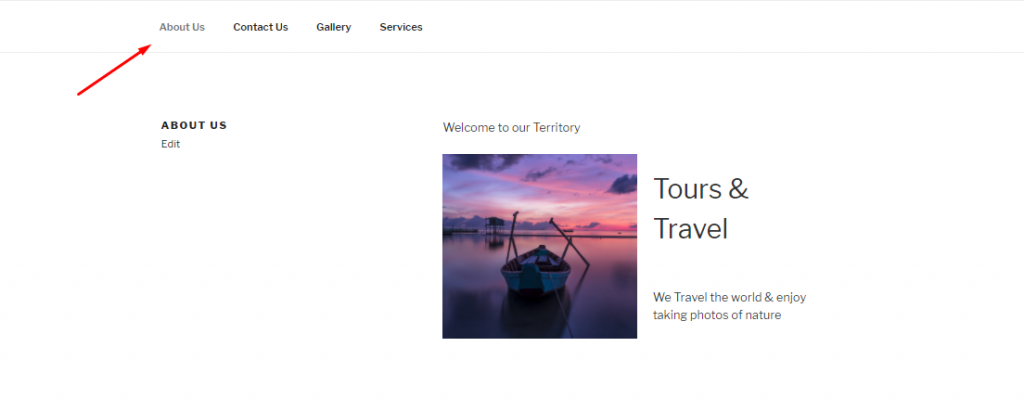
Well, here’s the frontend view of the created page. As you can see all the web pages are appearing here, including the About Us/Me page. So in this way you can design your website to make it more appealing & beautiful.
Create a First Blog Post
So all the basic settings are done, now we’ll be showing how you can create your first blog post and make it live for your site visitor.
First navigate to WP Dashboard>Posts>Add New.

- Add a title
- Write posts
- Add category, tags & elements if needed
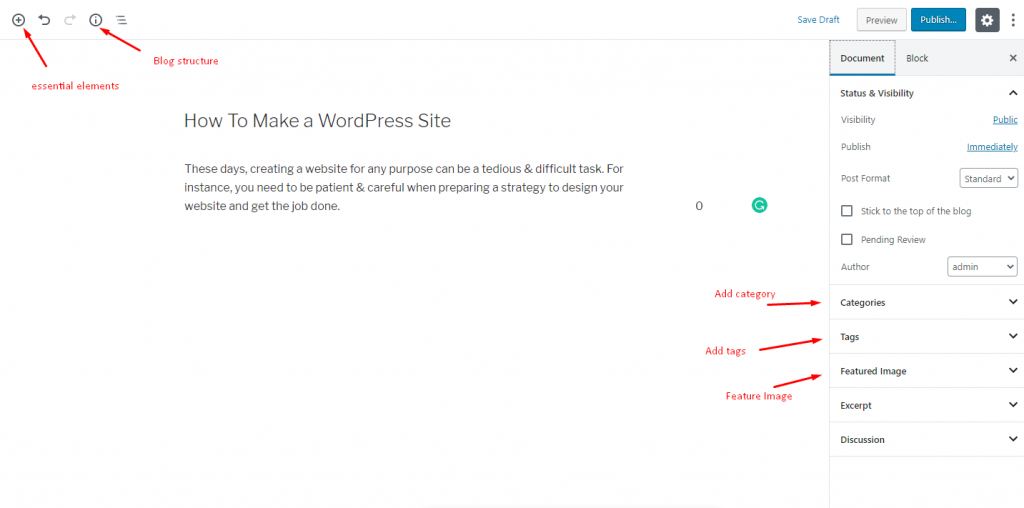
Next add a feature image & excerpt.

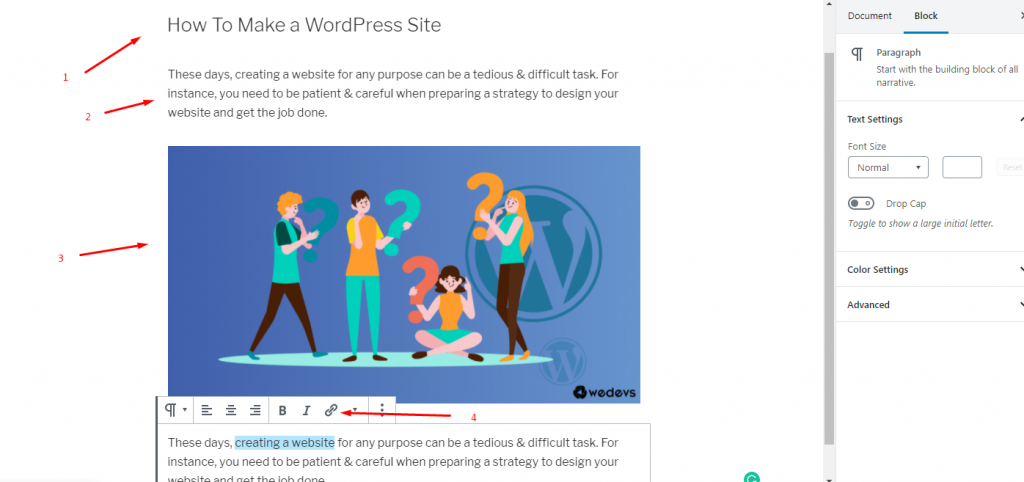
Now its time to edit the post. Here’s how you can do that.
- Write your content
- Add image inside the content
- Add links
So once you publish the blog, here is how it will look like for the visitors:-
If you want to get a detailed idea of how to create a blog post, you can check out the tutorial below.
Must read:- How To Create a Blog Post in WordPress
How to Create a Header on a WordPress site
The header is an integral part of any website. Most of the conversions & traffic are generated through an engaging header. Generally, a header includes social icons, quick navigation, important links and search button, and more.
So you need to put all the primary elements in the header part and showcase them in the right place of the website and in an appropriate way.
However, let’s check out this exclusive tutorial about creating the header for a WordPress site.↴
Related Article: How To Create an Engaging Header in WordPress
Bonus: Required Plugins To Speed Up Website’s Workflow
Using the right amount of WordPress plugins is really essential for your website. Therefore, once you set up your website with the general settings, now it’s time for you to install some essential WordPress plugins to regularize & boost your website’s workflow.
So before you use any plugins, you need to make sure that the plugin has the following ability to facilitate your website. Such as:-
- It should improve user experience
- Shouldn’t slow down your website
- Provide full-proof security
- Facility to have backups
- Well-optimized for search engines
- Has the ability to collect information
Let’s shortly see the essential plugins that you’ll need to customize your entire website:-
- Jetpack: It offers different functions like security, content tools, visitor engagement, social sharing, comments, spam protection, related post, and also improves the site performance.
- Yoast SEO (Free): Yoast SEO offers a set of tools that improves your website position in the search results. Also, it helps you to add XML Sitemaps, OpenGraph data and makes it easier to create your posts or pages SEO friendly.
- Google Analytics Plugin – Analytify (FREE & Pro): If you are concerned about your site’s performance, then you can use the Analytify plugin to get unlimited features like tracking user visits, site popularity, insights about visitors, page or post-performance, powerful analytics, and much more.
- W3 Total Cache (FREE): W3 Total Cache improves server performance, reduces page load & download times. It amazingly helps to develop your rank in search results.
- Security Plugin – Sucuri (FREE & Pro): Using this plugin you can secure your website from DDoS, XSS attacks, malware threats, brute force, etc.
- Elementor Page Builder (FREE & Pro): If you’re looking to design your web pages easily without coding skills? Elementor can be the ultimate guide for you. It provides a live page or visual page building facilities with a lot of features with ease.
- Backup Plugin – Updraftplus (FREE & Pro): Backup can be a great solution for you, especially if something unusual happens to your website. You can easily back up your essential data & other important files easily. So you can use Updraft plus backup Plugin to back up your WordPress anytime.
- WP User Frontend: Effortlessly build Registration Forms, Profiles, WooCommerce Products, Subscriptions & Contact Forms with Custom Post Types support.
- WP Project Manager: Smartly manage your projects, tasks, team, and collaborate with your co-workers using WP Project manager pro.
- weMail: You can easily now regulate and bring all the essential email marketing facilities using weMail. Also, it will help you to send the newsletter, collect leads, automated emails, auto add subscriber to a list, and manage subscriber all inside the WordPress dashboard
To get a detailed idea of essential plugins for a WordPress website, read the article below
Related Article:- Must Have WordPress Plugins for 2020
A Few FAQ Answered
Throughout the article, you may have some general queries in your mind. So, for your convenience, let’s highlight the answer to some frequently asked questions by the WordPress users worldwide.
1. Do I need to know any programming language to use WordPress?
Fortunately no! To use WordPress, you don’t have to learn or acquire any programming languages such as CSS or PHP. Because there are plenty of readymade options (Themes & Plugins) that are available for you to add features & functions right on to your WordPress site within a second.
2. How can I make money from my website?
Well, there are a lot of ways to make money online from your website. For instance, you need to follow the appropriate way & make the most out of it.
But if you’re searching for a shortcut way to get rich by making money online, then we’re really sorry to say, there’s no such way.
3. How do I start a website where I can sell products?
Using different eCommerce tools, you can easily add an online store to your WordPress site. Here’s the list of the best eCommerce plugins for WordPress. Also, you can check out our step by step guide on how to start an online store.

4. Is WordPress free?
Yes, WordPress is totally a free & open-source content management platform. But before you use it, you will need to invest in a web domain & hosting plan.
There are different web hosting plans that are available in the market. Initially, you can find hosting for $1 per month on a shared hosting plan, but we suggest you spend a little bit more on a managed WordPress hosting plan to manage your website easily.
5. Can I install WordPress on My PC?
Sure, you can easily do it! You have the privilege to install WordPress locally (on your computer) on almost every operating system. Depending on your experience level you can use a third-party solution like Desktop Server or local by Flywheel, or manually install WordPress using XAMPP, MAMP, WAMP, or LAMP.
6. Can I import my posts from another blog or blogging platform?
Yes – you can always export or import content from your old blog to your new WordPress blog. In this case, you can check out the official WordPress guide to import content from your old blog to the new one.
7. How can I add new features to my WordPress Site?
You can add unlimited new features & functionalities to your WordPress site using various plugins. Generally, the WordPress plugin works as an add-on for a website. Therefore, plugins typically add new features to your WordPress site to expand added features and bring innovations. So just install & configure the plugin based on your need.
However, you may also check out this guide on how to install & use a plugin.
8. Is it wise to start a website for free?
Some website builders may offer free facilities, but we don’t want to recommend using those. Often they will add their branding and advertisement on your website which may make it look ordinary.
So it’s better to purchase a domain name and hosting. Therefore you’ll have full ownership and control over your website to customize everything that you need in your own way.
9. What does a post format mean?
Basically, a post format is a style for your blog post that is typically based around the media/content in the post. Such as image, gallery, video, quote. You’ll get this option when you create a blog post on the right side of the screen in the “Format” meta box.
Learn more from our custom post types guide.
10. How can I create a new post?
To create a new WordPress post, first of all, log into your WordPress site. And then navigate to Posts > Add New. there you can add your post title, content, excerpt, and more.

Activate LiveChat Feature on Your Marketplace Using WhatsApp & TawkTo (New Feature)