How To Create An Editorial Calendar For Your WordPress Blog
Update: Web-push notifications are now enabled for the Chrome browser. This article has been updated with new information.

- Save
How many subscription channels are you offering on your blog?
If you haven’t already enabled the must-have subscription options, you should do that now.
With recent advancements in technology, there are now a few new methods that you can use to notify your readers of latest posts or important updates from your blog.


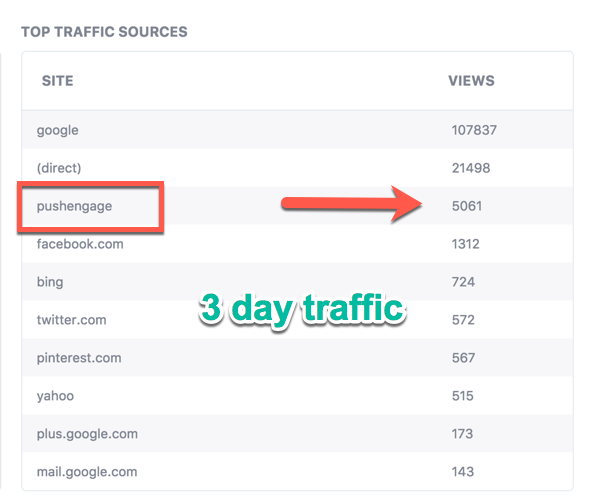
Today, I will be talking about PushEngage: A web push notification service for WordPress. It also supports other platforms like e-commerce sites, BlogSpot, Joomla, Drupal, bbPress & much more. Before moving ahead, let me show you how much traffic I got in 3 days from PushEngage:

- Save
Using the PushEngage service, you give another subscription option to the readers of your blog who are using Chrome (all platforms) or Safari on Mac OS.
Read: Benefits Of Web Push Notifications For Bloggers – Powerful Marketing Tech
If you are using a smartphone (iOS or Android), I’m sure you are aware of push notifications sent by your installed apps. Web-push notifications are similar to smartphone push notifications where your subscribers will be notified when a new post is published or when you manually send a push notification.
PushEngage is an awesome service that allows you to send these push notifications.
In this tutorial, I will show you how easy it is to enable push notifications for your WordPress blog.
You should open your WordPress blog’s admin panel and follow along with this tutorial. Within 5 minutes, your WordPress blog will be web-push notification enabled.
How to Get more subscribers & traffic with browser Push Notifications
At this moment, this service supports the Chrome browser on all platforms (mobile & desktop) and the Safari browser on Mac OS. In the future, we can expect it to support other browsers like Firefox.
The setup part is quick and easy. So let’s get started with this step-by-step guide.
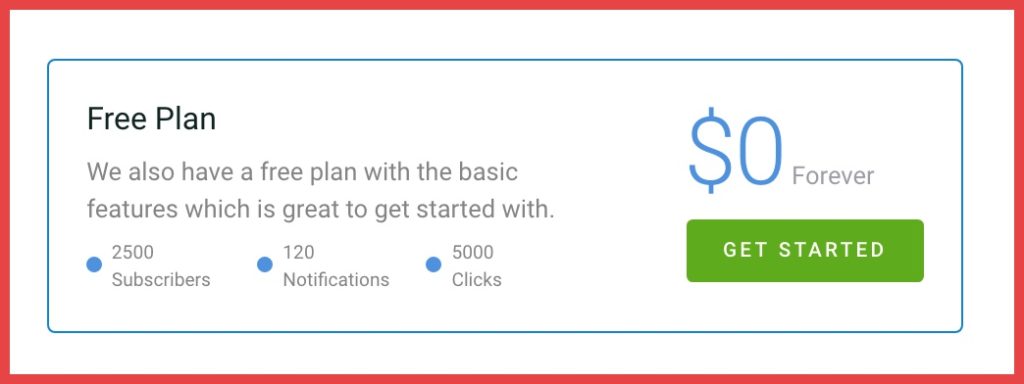
First, go ahead and create an account on PushEngage over here.
The free account allows you to send 120 push messages per month for 2,500 subscribers, which is a decent number for a small and medium-sized blog.

- Save
Once you have signed up for an account, you need to add your blog’s name and add your blog’s logo. This is useful for the branding of your push notifications.

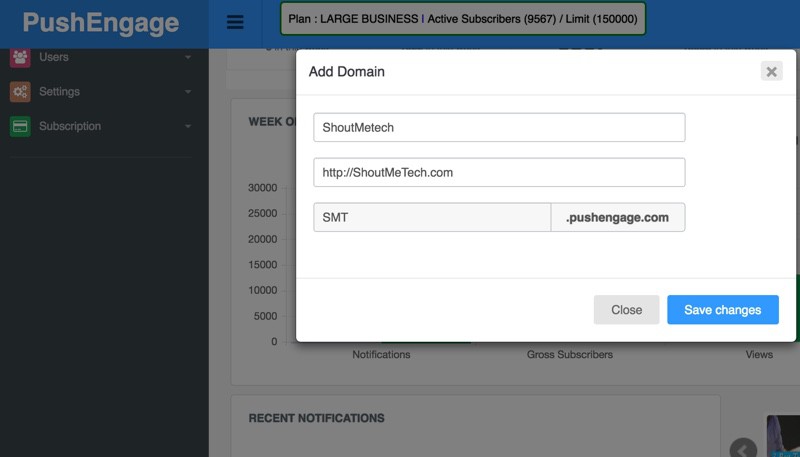
- Save
- Go to Plugins > Add New and search for “PushEngage”. Install and activate the plugin. <Link of the plugin>
- Upon activation of the plugin, click on PushEngage > Dashboard. To activate the plugin you need to get the API Key from your PushEngage account. I have marked the points in the below image that will help you create the API Key.

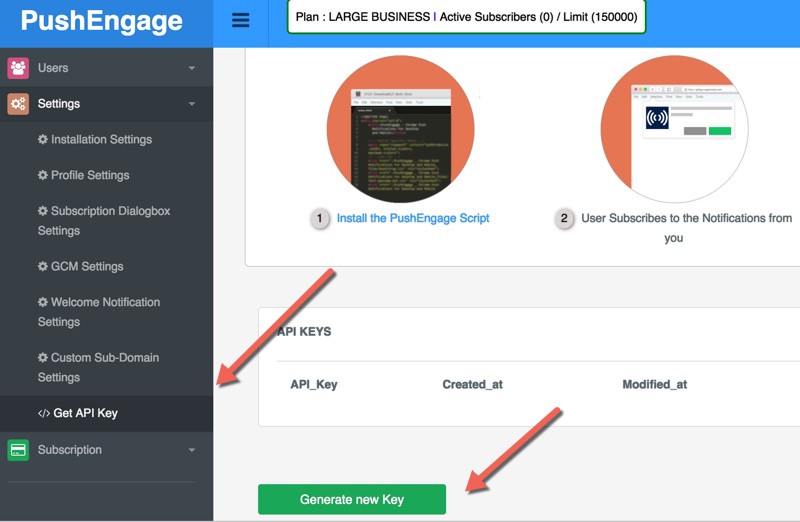
- Save
Once you are done activating the plugin, now you need to configure the subscription settings.
- Go to Settings > Installation Settings & add your logo. (This is important for your brand identity.)

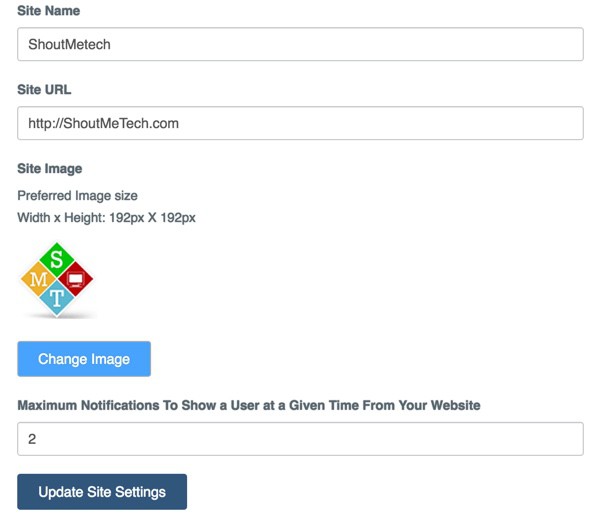
- Save
Subscription Dialog Box Settings
How To Make A Private WordPress Blog or A Private Post [Tutorial]
This is where you will configure the prompt that users will see to subscribe to your push updates. I use “Single Step Optin” for ShoutMeLoud & I suggest the same for you. “Safari Style Box” is another popular method.

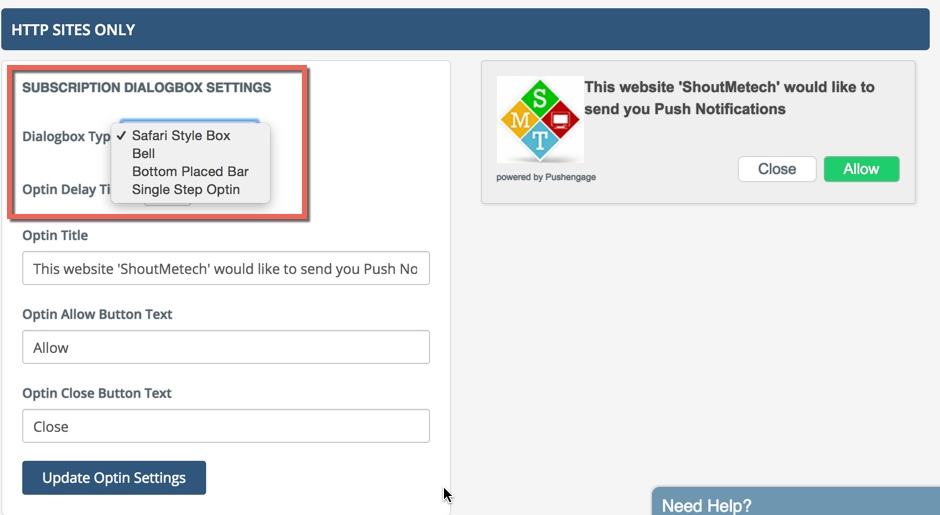
- Save
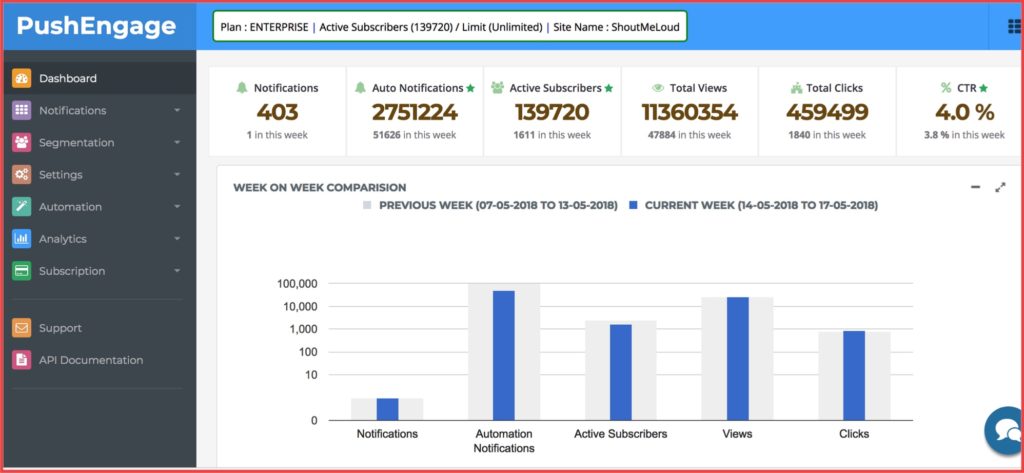
Once you are done and logged in, you will see a dashboard like the one below (in the screenshot). It will show you the stats of existing subscribed users and other details.
You can click on the “Send A Notification” tab to send a custom push message anytime.
GCM Settings
This value is pretty crucial & you really should create your GCM account.
If you are not so tech savvy, you can ignore it. However, using this documentation will make the process easier.
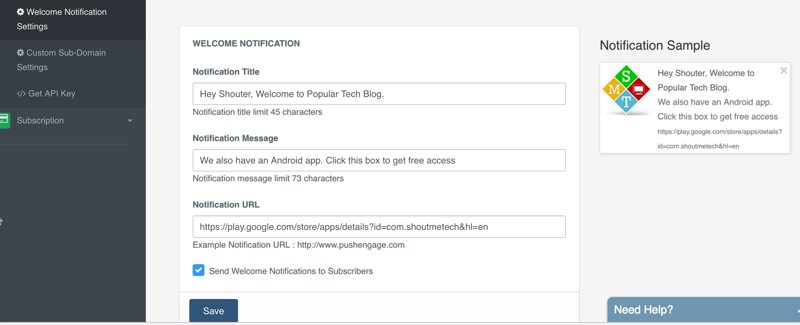
Welcome Notification

- Save
This step is optional.
If you want to send a welcome message to users who subscribed to your notifications, use this feature.
You can ask users to download your mobile app or send them to your top resources.
Stats
Here is a Stats report of push notifications from ShoutMeLoud:

- Save
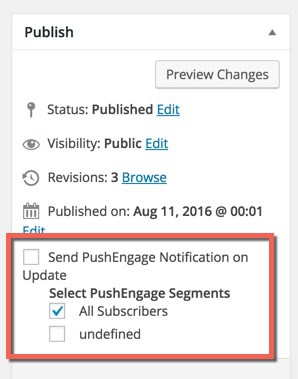
In your post writing section, you will see an option to send push notifications when you publish or update a post.

- Save
Try not to send too many push notifications in a short span. In the next guide, I will share a few tricks of PushEngage to help you make the most out of push notifications.
Get Started with PushEngage
Do let me know your experience with web-push notifications. Do you know of another modern subscription option that I should cover here on ShoutMeLoud?
Don’t forget to share this tutorial with your WordPress blogger friends on Facebook, Twitter, and Google Plus!
Here are a few hand-picked articles for you to read next:
- ShortPixel Review: How To Automatically Compress & Optimize WordPress Images
- Decoding 3 Best Solutions For Interlinking Blog Posts In WordPress
- How To Drive Huge Traffic To Your Blog In A Few Weeks
Subscribe on YouTube


- Save
Sharing is caring ️
- More
5 Proven Ways To Monetize Self-Hosted WordPress Blogs