9 Top Benefits of Using WordPress (All Major Advantages)
Want to edit .htaccess file?
Let’s learn that today…
The .htaccess file is not exclusive to WordPress. Every other Apache web hosting offers the .htaccess file feature.

- Save
Confused?


Let us first understand what a .htaccess file is.
Page Contents
What is the WordPress .htaccess file?
In most of the cases, when you install WordPress, the .htaccess file comes by default.
However, it stays in hidden mode at the root of your WordPress installation. Sometimes, the .htaccess file is not present, and you have to create the .htaccess file in WordPress manually.
Now, we can use a normal text editor to update or remove the content of our WordPress blog .htaccess file.
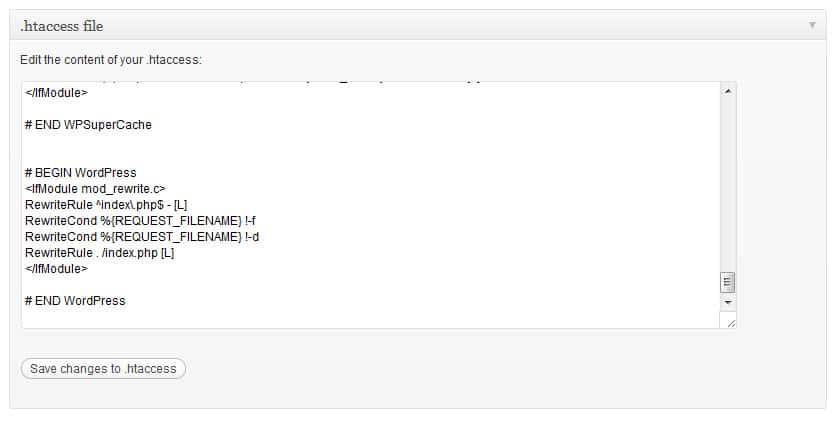
Below is the default code for your WordPress htaccess file:
# BEGIN WordPress
RewriteRule ^index\.php$ – [L]RewriteCond %{REQUEST_FILENAME} !-f
RewriteCond %{REQUEST_FILENAME} !-d
RewriteRule . /index.php [L]
# END WordPress
Let us take, for example, a question asked by one of ShoutMeLoud’s readers Kashish.
Q: Hi, I want to edit my Permalink to /%postname? in WordPress, and it says to add some code in my .htaccess.txt file, but I could not find it anywhere in my dashboard or the root directory. How do I create WordPress .htaccess file and add the code into it?
Now, here is how you can solve the problem:
In most WordPress blogs, the .htaccess file resides by default in the root of WordPress installation.
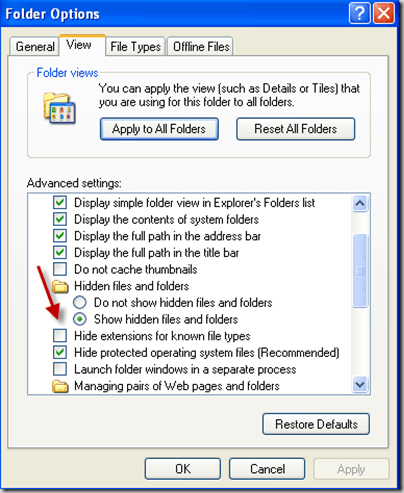
All you need to do is click on force showing hidden file, from the options menu, which has been explained earlier.
In case the .htaccess file does not exist, just create a new notepad file (htaccess.txt) and rename it to .htaccess. Make sure that it is not like .htaccess.txt in any way. If you use Windows, you can uncheck the option which says Hide extension for known file types.

- Save
Once you have renamed the file to .htaccess, upload it to the root of WordPress installation and edit your file according to your need. In case you have a hard time renaming from htaccess.txt to .htaccess, simply upload the htaccess.txt file and rename it on the server.
Sounds simpler now?
No?
Let us further learn how to can edit .htaccess file.
For a better understanding, I’m sharing a quick tutorial on how to edit your WordPress .htaccess file.
There are many methods which you can follow, three of which are mentioned below:
- From the cPanel.
- From the WordPress dashboard.
- Using a desktop FTP client.
Moreover, when you edit your WordPress permalinks, you need to update your .htaccess file. If you are a self-hosted WordPress user, you MUST know about the .htaccess file and how to edit it.
How To Move WordPress Site To New Host With Zero Downtime
How to edit WordPress .htaccess file using cPanel:
Most web hosting companies offer cPanel, which makes it easier for non-technical people to play around with and modify their .htaccess file.
The cPanel is especially useful for non-technical people who need to add or edit some codes. They can quickly do it using this online editor.
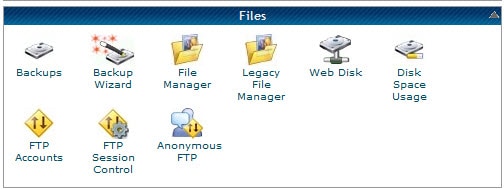
First, log in to your cPanel. Click on “File Manager” under the “Files” section.

- Save
Depending on your WordPress installation directory, you will find .htaccess at the root of your WP installation. If you don’t see it, refer to my create WordPress .htaccess notes to add one.
Select the .htaccess file and click on “Edit”. This will open the editor in a new tab, and you can make changes from there.

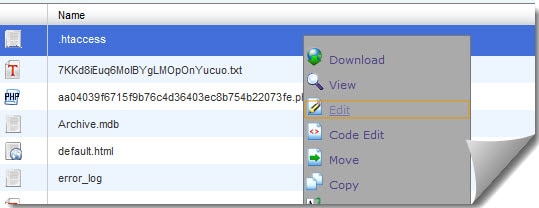
- Save
Make changes and save the file.
Boom!
Next,
Editing .htaccess from the WordPress dashboard:
There are many WordPress plugins which offer the feature to edit your .htaccess file from the WP dashboard. If you use the Rankmath plugin or SEO by Yoast plugin, you can access it from plugin settings.
For Yoast SEO: SEO by Yoast > Edit Files.

- Save
If you are using Rank Math, you can go to Rank Math> General settings > Edit .htaccess
Editing .htaccess file using FTP client:
This is my favourite method as I love to do things on a desktop. To top it up, FTP clients give you more control.
Use any free FTP client like FileZilla and log in to your FTP hosting account. Browse to the root of your installation. You have to enable Show Hidden Items to see the .htaccess file.
Here is how you can enable it:
FileZilla Menu Options > Select Server > Force showing hidden files
Now, navigate to the root folder of your domain. Your .htaccess file will be at the root of the folder.
Download your .htaccess file and start editing.
Make sure you take a backup of your .htaccess file before you start editing it. You can use your OS default text editor to edit the file. Once it’s edited, upload it back again.
- Make sure that the permission of your .htaccess file is 644 and NOT 777.
In the upcoming posts, I will be sharing a couple of WordPress .htaccess hacks which will make your life easier.
Keep watching this space.
You might also consider reading:
- Step By Step Guide To Installing A Self-Hosted WordPress Blog
- WordPress vs. Blogger : Which Is Better & Why?
Do let us know if you still have questions regarding the steps to edit your WordPress .htaccess file.
Do subscribe to our email newsletter to receive more WordPress tutorials!
Subscribe on YouTube

- Save
Sharing is caring ️
- More
Which is the Best WordPress Permalink Structure for SEO?